Walkthrough editors
Block Out Levels 1024-1027: A Stepped Field Over a Wide Red Belt, a Blue-and-Red Pair, a Gem-Badged Red Room and Three Tall Narrow Bins
Block Out Levels 1024-1027: 1024 hangs a stepped pink-and-red field above a wide red 5 belt with two 1 slots underneath, 1025 gives a tall blue 5 and a red 9 most of the board, 1026 stacks a 19 bin and a gem-badged red room over a wide 8 bin, and 1027 sets three tall bins marked 3, 2 and 2 above a compact field, with previews and video solutions for every level.
Related video walkthroughs
The library now runs to Level 1027. 1024 through 1027 went up as one batch, all four rated Expert, and each one has a page on the site plus a video solution on YouTube. The previous batch was 1020-1023, so this picks up right after it.
The batch moves the same way as the last few: the containers get the biggest share of the board and the field is whatever is left around them. 1024 hides a stepped field above a wide red belt; 1025 splits the top into a tall blue bin and a red bin; 1026 stacks three rooms and leaves a stair-step field at the bottom; 1027 lines up three tall bins and tucks the field underneath. In every case the small numbered slots on the border are the first throats, and the large rooms are the last thing you fill.
Levels 1024-1027 at a glance
| Level | Difficulty | Walkthrough | Video |
|---|---|---|---|
| Level 1024 | Expert | Open the guide | Watch |
| Level 1025 | Expert | Open the guide | Watch |
| Level 1026 | Expert | Open the guide | Watch |
| Level 1027 | Expert | Open the guide | Watch |
The four newest boards
Each entry below has the board preview, a link to its own page and the video solution. Watch only as far as the first tray completing, then restart and replay that part yourself before watching the rest.
Level 1024
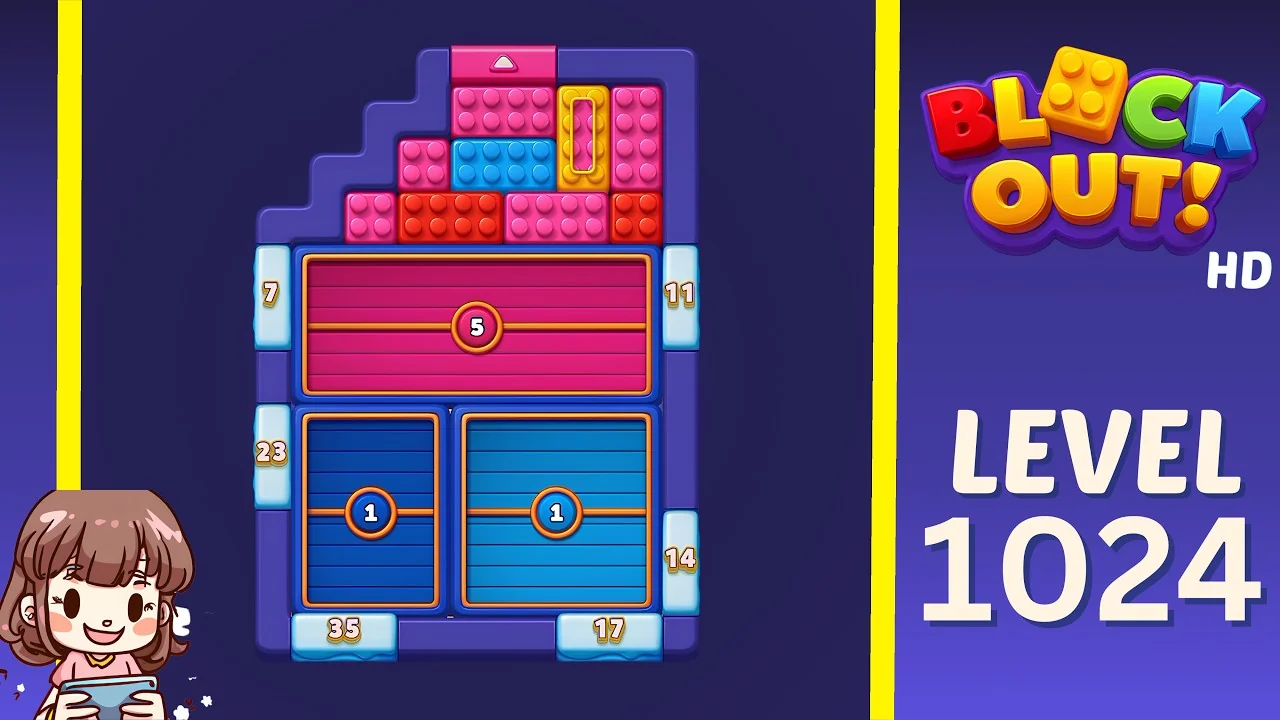
Open the Level 1024 walkthrough or watch the video solution on YouTube.
The board is split almost evenly: a stepped field across the top third and three containers underneath. The wide red belt marked 5 sits directly below the field in a gold frame, a deep blue bin marked 1 fills the lower left, and a teal bin marked 1 fills the lower right. The field itself is a staircase of pink bricks, red bricks, blue bricks, a yellow-framed vertical slot and a pink vertical block, with a pink tray and a white up arrow at the top. Counters read 7 and 23 down the left, 11 and 14 down the right, and 85 and 17 along the bottom. The two 1 bins are the narrowest mouths on the board, so the stepped top has to be fed into them first while the red 5 stays empty for the bulk of the red family.
Level 1025
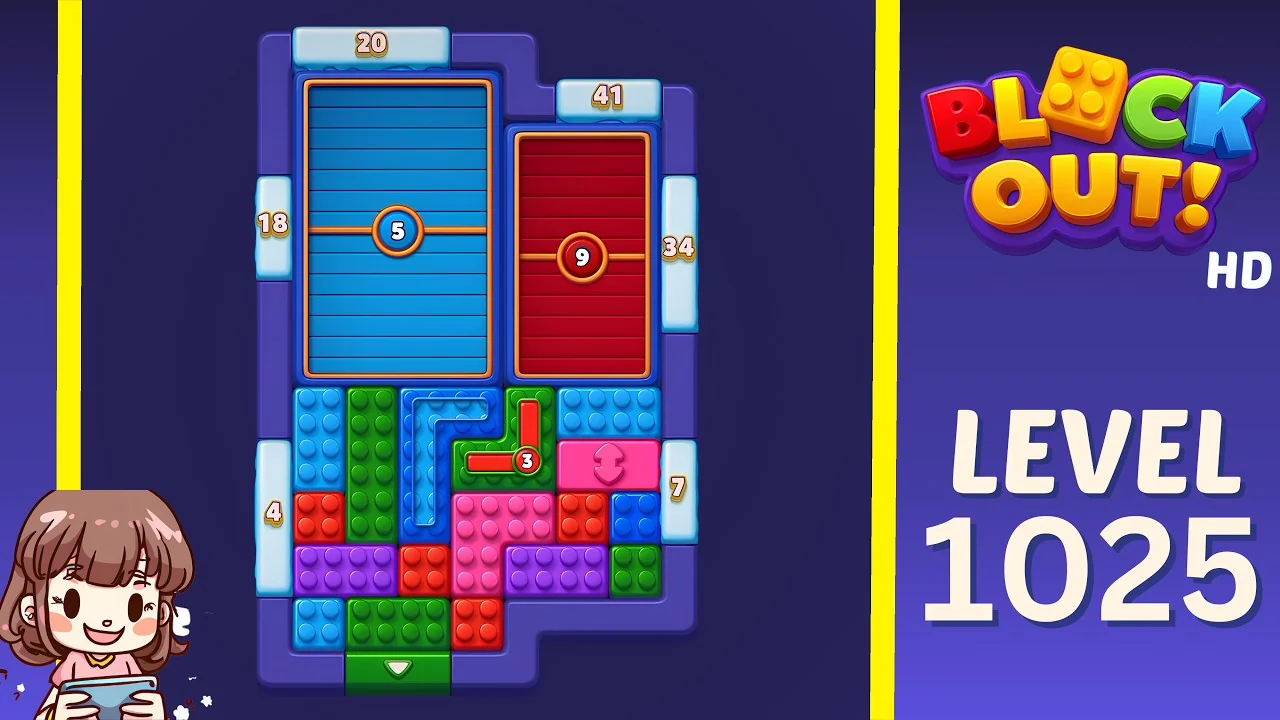
Open the Level 1025 walkthrough or watch the video solution on YouTube.
Two tall rooms own the upper half: a blue bin marked 5 in a gold frame on the left and a red bin marked 9 in a gold frame on the right. The field fills the lower half and the left edge: blue bricks, green bricks, red bricks, pink bricks and purple bricks, a blue L, a red L, a green L, a pink tray and a pink block with a white up arrow, plus a green strip with a white down arrow along the bottom. Counters read 20 and 41 along the top, 18 and 4 down the left, and 34 and 7 down the right. With only a 5 and a 9 open at the top, the 4 on the left and the 7 on the right are the tiny outlets that decide the opening, and the bottom green arrow is where the leftovers drain.
Level 1026
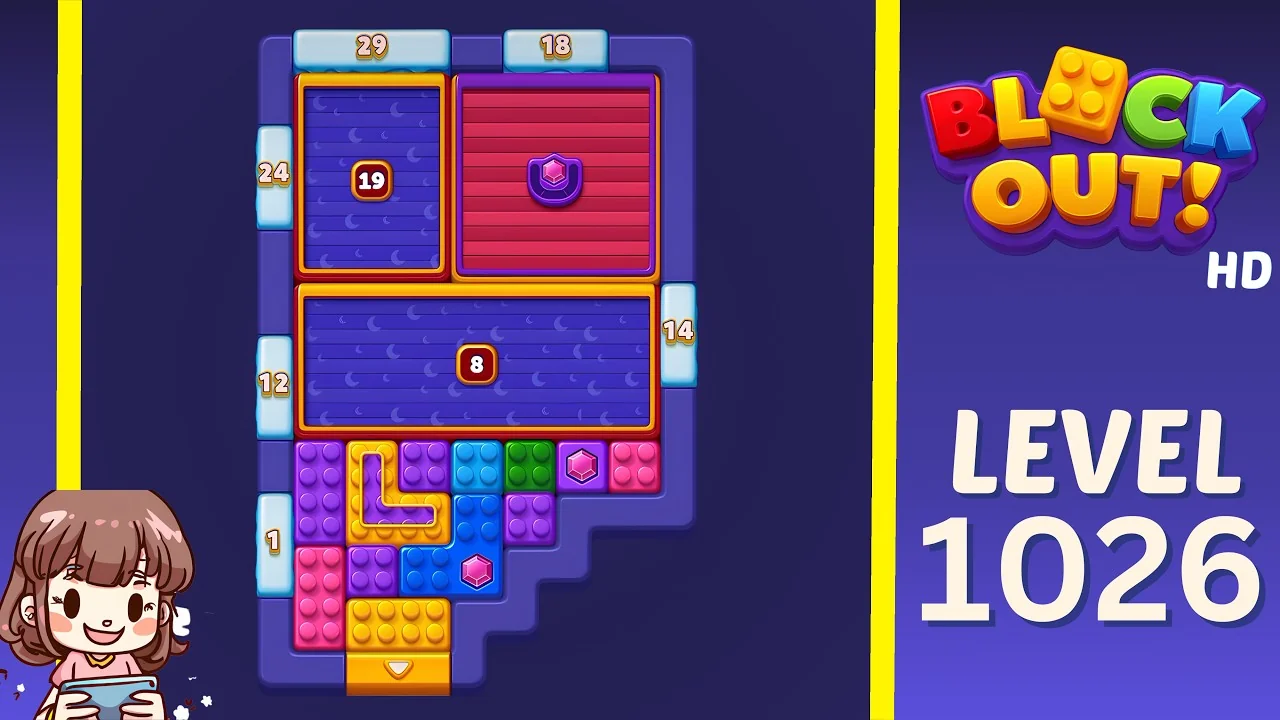
Open the Level 1026 walkthrough or watch the video solution on YouTube.
Three rooms are stacked above a stair-step field. A deep blue bin marked 19 fills the upper left, a red room with a purple gem badge takes the upper right, and a wide blue bin marked 8 spans the middle in a gold frame. The field is the bottom left: purple bricks, blue bricks, green bricks and pink bricks, a yellow L, a purple gem and a pink gem, with a yellow strip and a white down arrow at the very bottom. Counters read 29 and 18 along the top, 24, 12 and 1 down the left, and 14 down the right. The 1 on the lower left is far smaller than everything else, so it sets the pace; the wide 8 and the 19 are deep outlets that should only start filling once the field has been split by colour.
Level 1027
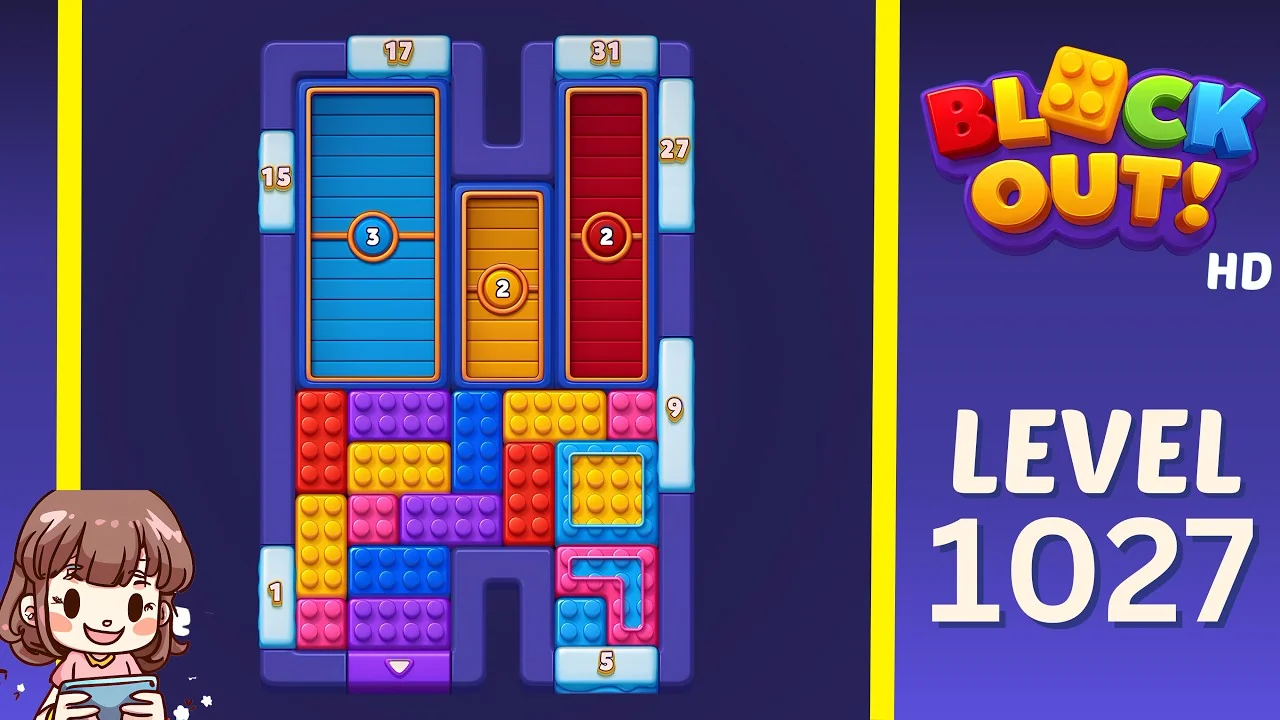
Open the Level 1027 walkthrough or watch the video solution on YouTube.
Three tall bins stand side by side across the top: a blue bin marked 3 in a gold frame on the left, a yellow bin marked 2 in the middle, and a red bin marked 2 on the right. The field fills the bottom half: red bricks, purple bricks, blue bricks, yellow bricks and pink bricks, a yellow L, a blue tray, a pink L and a purple block with a white down arrow. Counters read 17 and 31 along the top, 15 and 1 down the left, 27 and 9 down the right, and 5 along the bottom. The two 2 bins are the smallest tops on the board and the 1 on the left is the narrowest border slot, so the opening has to clear the small mouths before the blue 3 and the tall side counters come into play.
What to watch for on these boards
The videos are verified solves, not scripts. The useful part is the shape of each board:
- A field shaped like stairs. On 1024 the top third is a staircase, and the two 1 bins underneath can only take one colour family each, so the step order is fixed.
- Two big rooms, one small field. On 1025 the 5 and the 9 dominate the board, which leaves the 4 and the 7 as the real opening throats.
- A gem badge on the deep room. On 1026 the red room has no number, only a gem badge, so it is the last place the reds should go.
- Three narrow tops. On 1027 the 3, 2 and 2 are all small, so the field has to be sorted by which bin can actually receive it.
- Small outlets first. On every board in this batch the border slots are smaller than the deep rooms, so clearing the small throats before the big rooms fill is the whole game.
How to use the walkthroughs
Every level from 1024 to 1027 has its own page with the board preview, difficulty rating and embedded video. A method that holds up on Expert boards:
- Watch only up to the first tray completing.
- Restart and replay that opening yourself.
- Keep going alone until you stall.
- Rewatch from the point your route went wrong, not from the start.
Browse all Block Out levels for the full library, or go back to the 1020-1023 log if you are still working through the previous batch.