Walkthrough editors
Block Out Levels 984-989: Staircase Fields, Star Tiles and Six Deep Wells
Block Out Levels 984-989: 984 sets a wooden 5 and a blue 4 over a wide 9 shelf, 985 swaps the layout so the field sits above two single-block trays, 986 doubles the top storage into a 10 and a 22, 987 hides a 10 and a 14 under the bricks, 988 steps a narrow 13 above a wide 16, and 989 closes the run with a 13 and a 26 over a two-branch field, with previews and video solutions for every level.
Related video walkthroughs
The library now runs to Level 989. 984 through 989 went up as one batch, all six rated Expert, and each one has a page on the site plus a video solution on YouTube. The previous batch was 979-983, so this picks up where that run ended.
This batch alternates the two shapes the game leans on at the top of the Expert curve. On 984, 986 and 989 the trays fill the upper half and the bricks are compressed into a short bottom field; on 985, 987 and 988 the field keeps the top and the storage is pushed below it. Both layouts punish the same mistake in different ways, because the direction the trays open decides whether a clear lands where you wanted it or one row past it.
What changes across the six is how much buffer you get. 984 gives you three separate trays, 985 gives you two marked 1, and 989 gives you a 13 beside a 26 that together hold more than half the bricks on the board. The largest tray is not always the safest: in every one of these boards it is the tray that looks like spare space until it becomes the only space left.
Levels 984-989 at a glance
| Level | Difficulty | Walkthrough | Video |
|---|---|---|---|
| Level 984 | Expert | Open the guide | Watch |
| Level 985 | Expert | Open the guide | Watch |
| Level 986 | Expert | Open the guide | Watch |
| Level 987 | Expert | Open the guide | Watch |
| Level 988 | Expert | Open the guide | Watch |
| Level 989 | Expert | Open the guide | Watch |
The six newest boards
Each entry below has the board preview, a link to its own page and the video solution. Watch only as far as the first tray completing, then restart and replay that part yourself before watching the rest.
Level 984
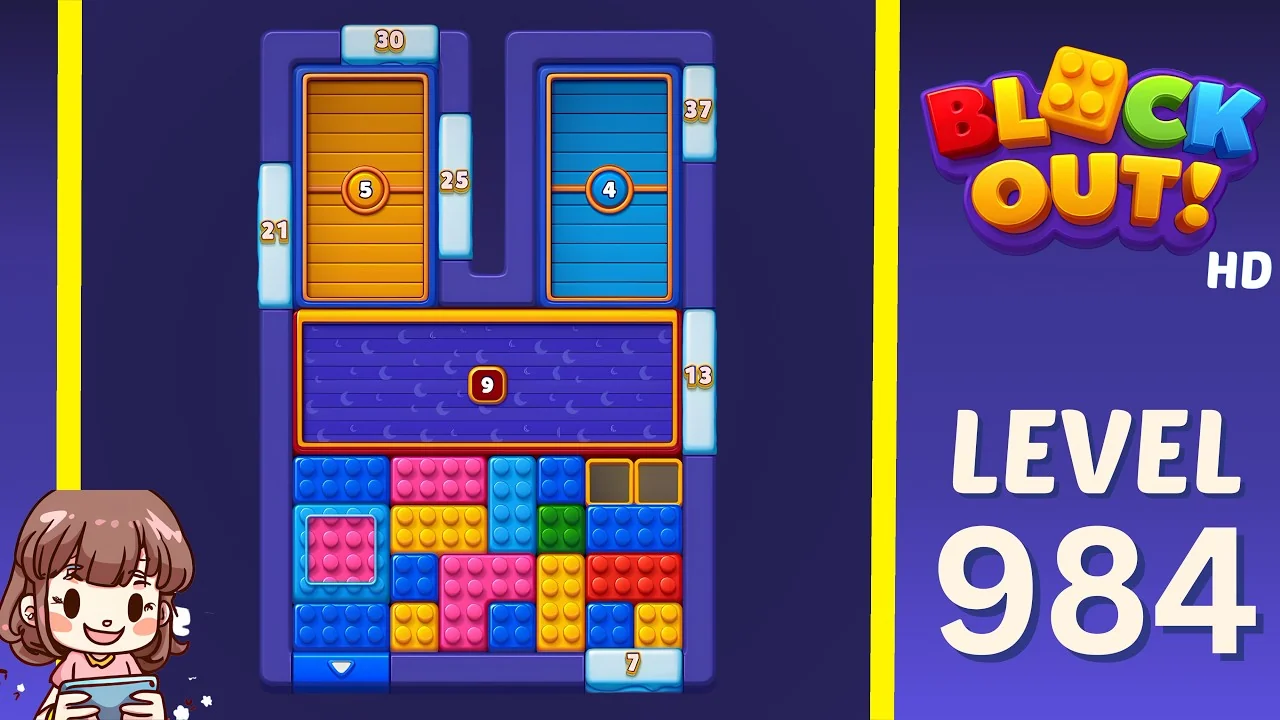
Open the Level 984 walkthrough or watch the video solution on YouTube.
The top half splits into a wooden tray marked 5 on the left, under a 30 counter, and a blue tray marked 4 on the right under a 37. A wide purple shelf marked 9 spans the width beneath both, with a 13 to its right. The field is the bottom block: pink, blue, yellow, green and red bricks, a pink square piece and a blue down arrow at the lower edge, with a 7 at the bottom right and counters 21 on the left and 25 between the upper trays. The 5 and the 4 are small and close together, so the 9 is doing most of the work; keep it empty until one of the upper trays is ready to close.
Level 985
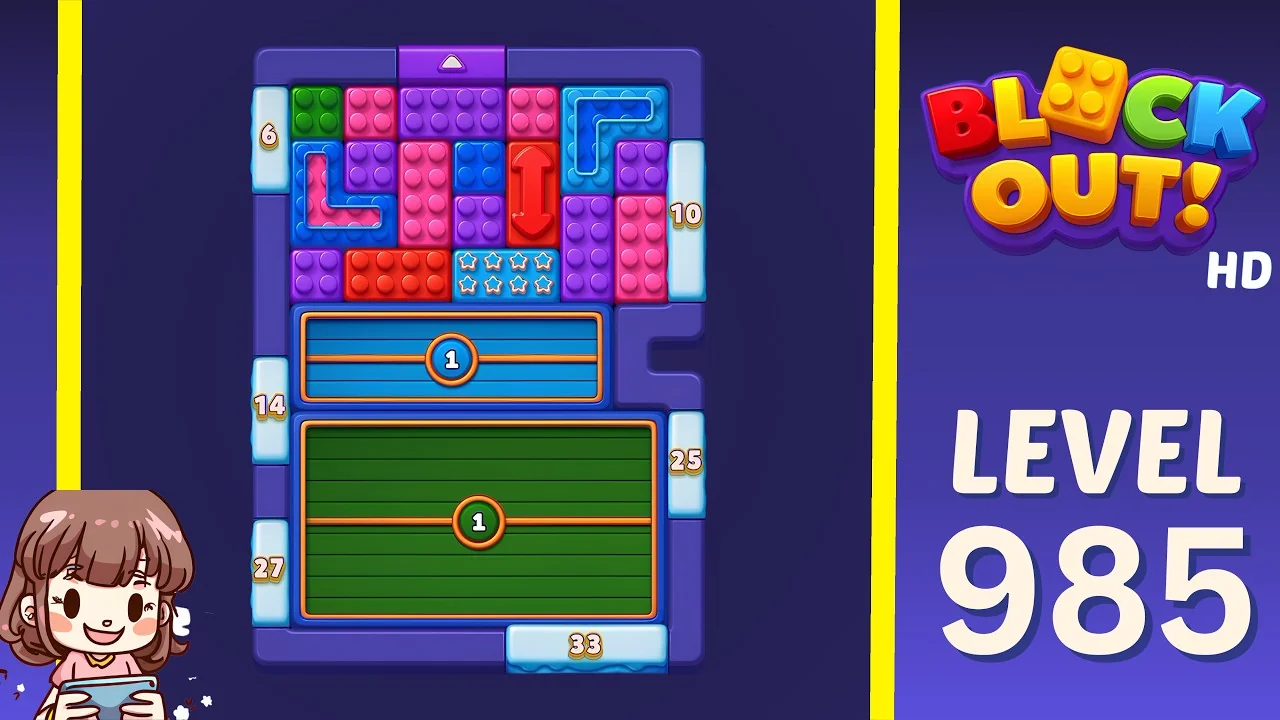
Open the Level 985 walkthrough or watch the video solution on YouTube.
The layout flips: the field takes the top, with green, pink, purple, blue and red bricks, a blue up arrow at the very top edge, a red down arrow in the middle, blue L and Z pieces, and a cluster of star-marked tiles near the bottom of the field. Below sit two wide trays, both marked 1 — a blue one directly under the field and a green one under that. Counters read 6 and 10 on the upper sides, 14 and 27 on the left, 25 on the right and 33 along the bottom. Two single-block trays mean almost no slack: the blue 1 fills first and the green 1 has to absorb everything after it, so keep the star tiles for the green tray.
Level 986
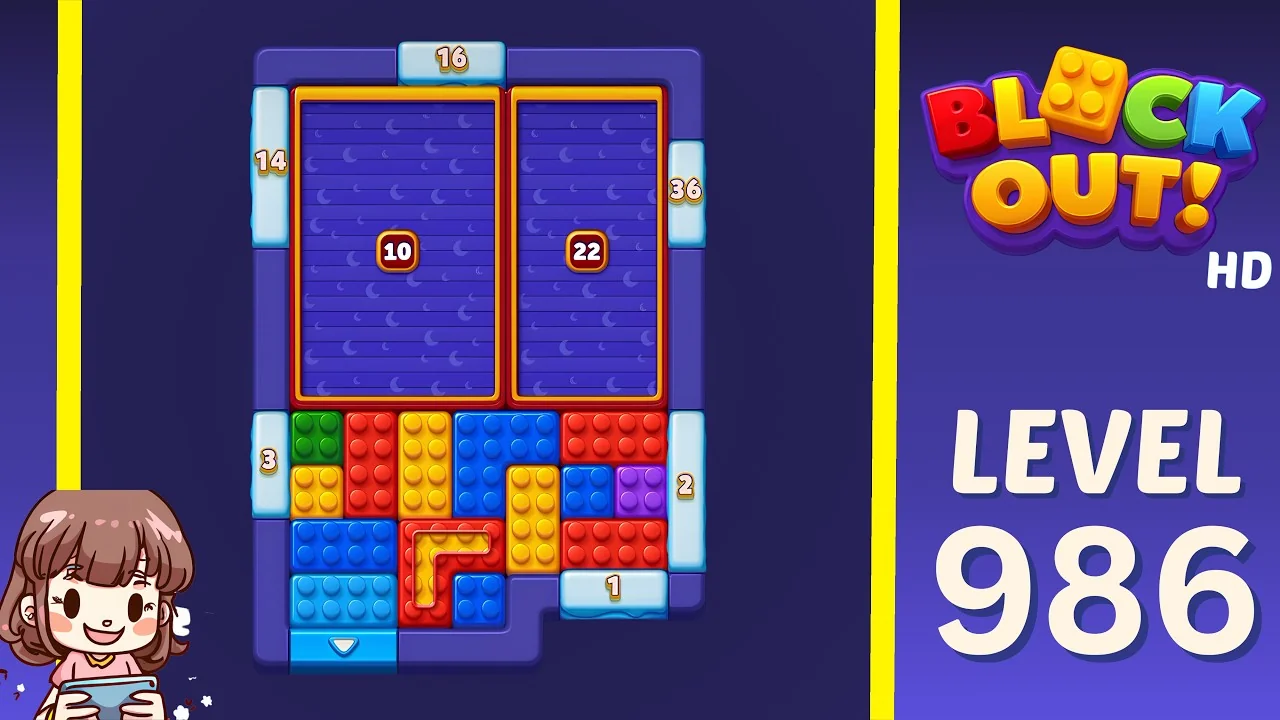
Open the Level 986 walkthrough or watch the video solution on YouTube.
Two deep purple trays fill the top, a 10 on the left and a 22 on the right, with 16 above them and 14 and 36 on the outer edges. The field is the bottom band: green, red, yellow, blue, purple and orange bricks, a yellow L piece, a blue down arrow at the bottom left and a 1 at the bottom right, with 3 and 2 on the sides. The 10 and the 22 open in the same direction onto a field that has only a few columns, so the first colour you feed decides which tray stays clean. Fill the 10 first; the 22 is the only thing that can take the long red and blue runs later.
Level 987
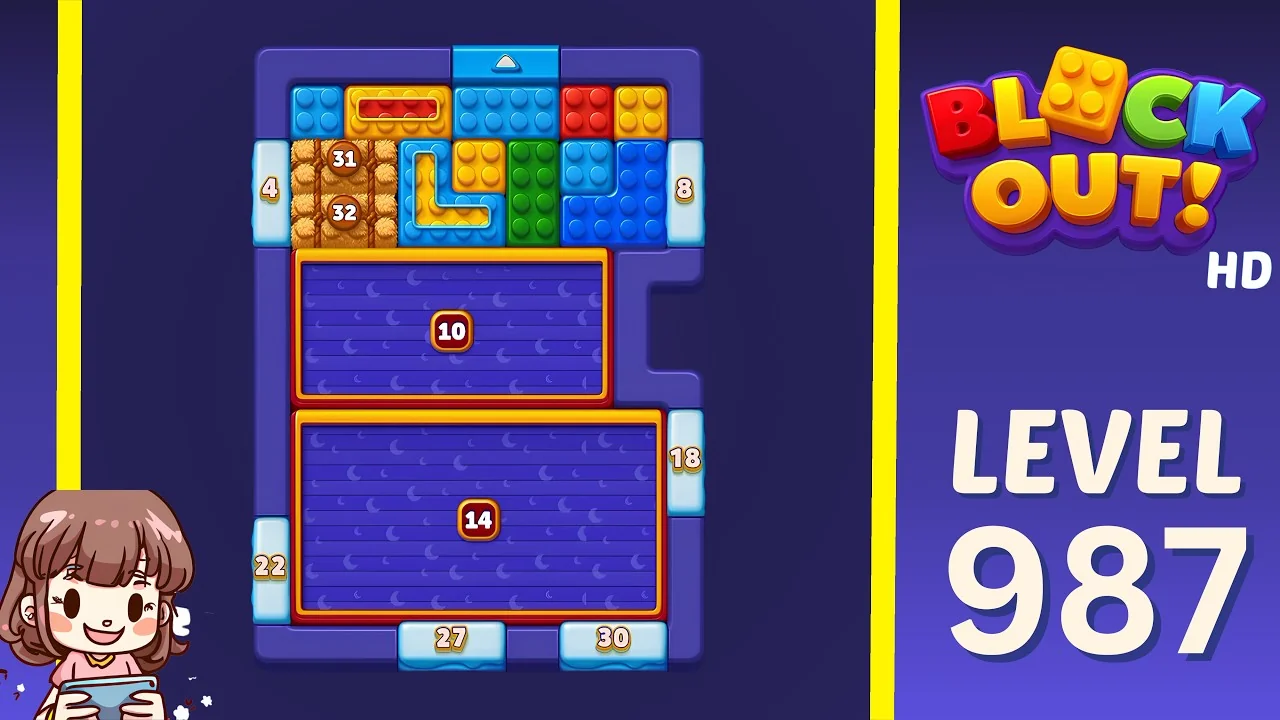
Open the Level 987 walkthrough or watch the video solution on YouTube.
The field sits at the top: green, blue, red, yellow and wooden bricks, a red barred piece across the upper left, wooden segments marked 31 and 32 down the left side, a blue L piece in the middle and a blue up arrow at the top edge. Under the field are two wide purple trays, a 10 above and a 14 below, with counters 4 and 22 on the left, 8 and 18 on the right, and 27 and 30 along the bottom. The wooden 31 and 32 stretch the field's left column, so the first clears arrive later than they look. Start the 10 only when the left column is ready to release, or the 14 below it inherits a mix.
Level 988
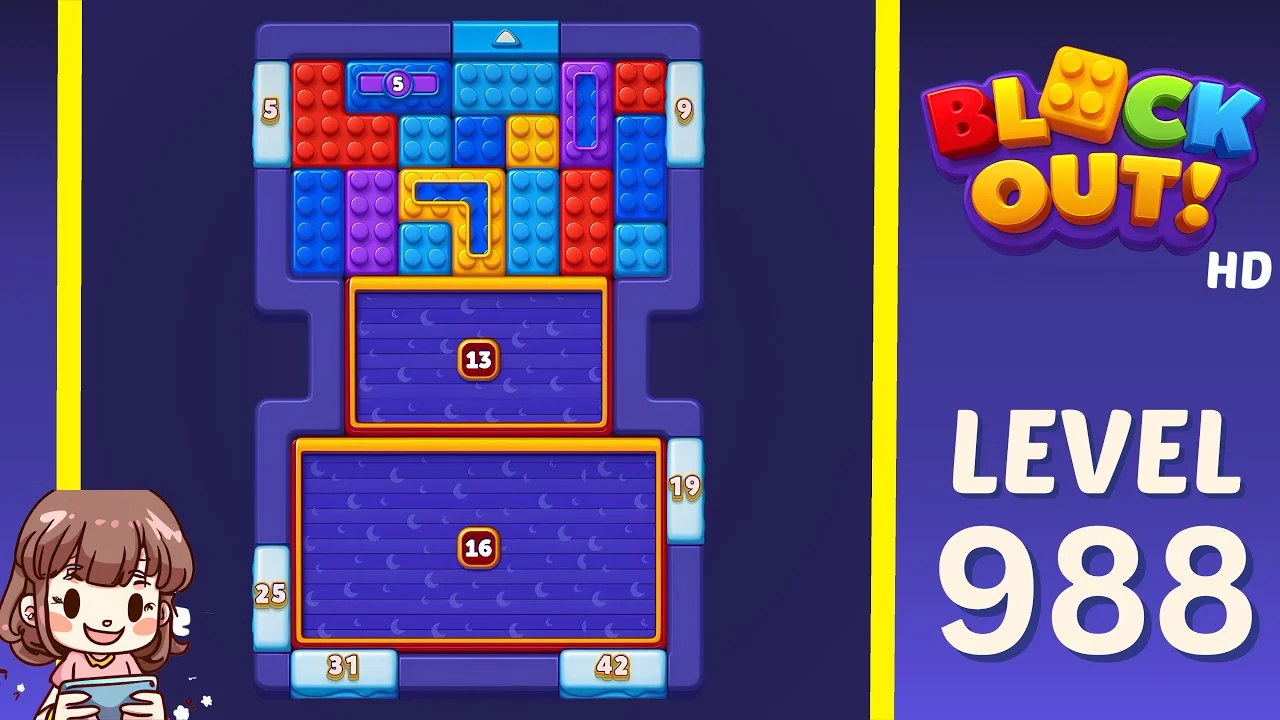
Open the Level 988 walkthrough or watch the video solution on YouTube.
A blue up arrow tops a field of red, blue, yellow, purple and orange bricks, with a purple tray piece marked 5 set into the upper row. Below the bricks the storage steps outward: a narrower purple shelf marked 13, then a wider purple shelf marked 16 beneath it. Counters read 5 and 25 on the left, 9 and 19 on the right, and 31 and 42 along the bottom. The 16 is the widest landing zone on the board and the easiest to contaminate, because the 13 above it drops straight in once it closes. Use the 13 as the working tray and leave the 16 for the colour that keeps coming out of the right-hand columns.
Level 989
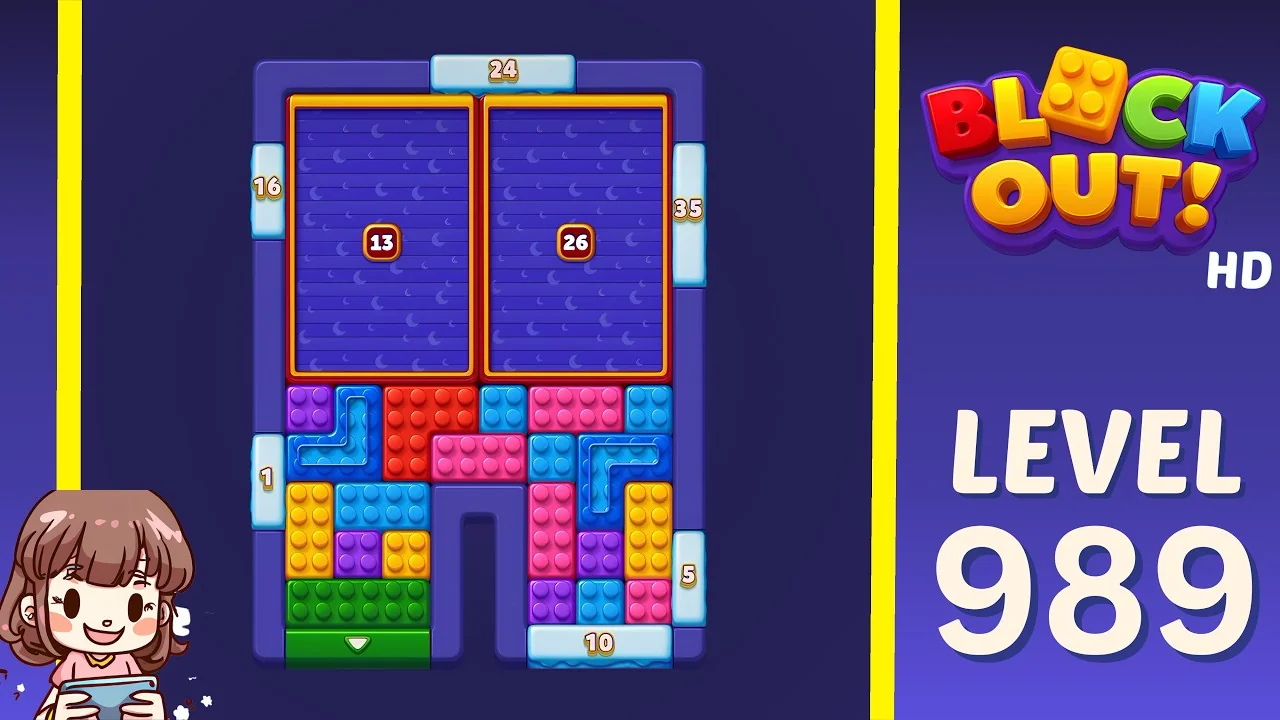
Open the Level 989 walkthrough or watch the video solution on YouTube.
Two deep purple trays share the top, a 13 on the left and a 26 on the right, with 16 and 35 on the outer edges and 24 above. The field is the bottom half: blue, red, pink, purple, yellow and green bricks, blue L pieces on both sides, a green down arrow at the bottom edge and a 10 at the bottom right, with counters 1 on the left and 5 on the right. The field splits around a notch in the lower middle, so bricks do not reach both trays equally. Commit the 13 to the left branch early and keep the 26 for the right-hand pink and purple runs, or the notch strands one side.
What to watch for on these boards
The videos are verified solves, not scripts. The useful part is the shape of each board:
- Storage above or below changes the drop. On 984, 986 and 989 the trays hang over the field; on 985, 987 and 988 the field sits above the trays, so clears fall later and you see them coming.
- Single-block trays are traps. The pair of 1s on 985 look harmless and then leave no room for error; treat each one as a timed decision, not a permanent home.
- The widest shelf is the buffer. The 9 on 984, the 22 on 986, the 14 on 987, the 16 on 988 and the 26 on 989 all invite overfilling. Open them last.
- A notch splits the field. The lower-middle gap on 989 sends bricks to one side or the other, so a colour committed across the notch never reunites.
- Long wooden segments release late. The 31 and 32 on 987 hold the left column longer than the rest of the field, which delays every route that starts on that side.
How to use the walkthroughs
Every level from 984 to 989 has its own page with the board preview, difficulty rating and embedded video. A method that holds up on Expert boards:
- Watch only up to the first tray completing.
- Restart and replay that opening yourself.
- Keep going alone until you stall.
- Rewatch from the point your route went wrong, not from the start.
Browse all Block Out levels for the full library, or go back to the 979-983 log if you are still working through the previous batch.