Walkthrough editors
Block Out Levels 932-937: Six Expert Boards That Put the Trays on the Frame Edge
Block Out Levels 932-937: six Expert boards with edge-mounted trays, tinted gate bars and tight bottom fields, plus board previews and video solutions for every level.
Related video walkthroughs
The library now runs to Level 937. 932 through 937 went up as one batch, all six rated Expert, and every one has a page on the site and a video solution on YouTube. The previous batch was 926-931, so this picks up exactly where that run ended.
The 920s ended on wide trays with the biggest counters on the board. This batch goes the other way. The big trays have moved out to the frame edge, and in four of the six boards they are pressed against a side counter rather than floating in the middle. What is left in the centre is either a thin block field (932, 934) or a single vertical slider that runs most of the height of the frame (933, 937). That changes the opening: instead of hunting for the deepest sink first, you are looking for whichever tray can be opened from the edge without dragging the centre field along with it.
The counters have also come down. There is no 37 or 46 in this run. The numbers that matter are a 47 in the bottom left of 937, a 32 on the left edge of 934 and a 29 across the top of the same board, and below them a cluster of 2s, 3s and 5s that have to be saved rather than spent.
Levels 932-937 at a glance
| Level | Difficulty | Walkthrough | Video |
|---|---|---|---|
| Level 932 | Expert | Open the guide | Watch |
| Level 933 | Expert | Open the guide | Watch |
| Level 934 | Expert | Open the guide | Watch |
| Level 935 | Expert | Open the guide | Watch |
| Level 936 | Expert | Open the guide | Watch |
| Level 937 | Expert | Open the guide | Watch |
The six newest boards
Each entry below has the board preview, a link to its own page and the video solution. Watch only as far as the first tray completing, then restart and replay that part yourself before watching the rest.
Level 932
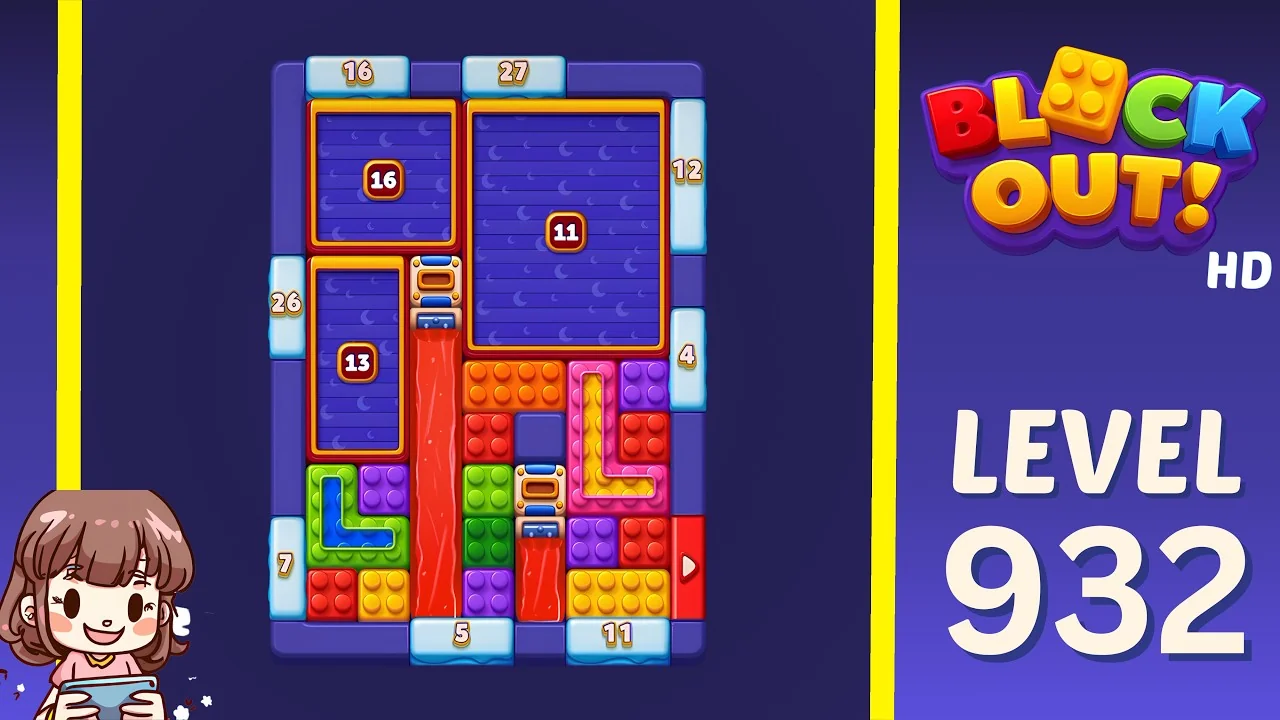
Open the Level 932 walkthrough or watch the video solution on YouTube.
Three purple trays fill the top two thirds: a 16 in the top left, an 11 in the top right and a 13 below the 16. They are separated by thick orange frames and sit directly against the border counters, so the black lane between the 16 and the 11 is the only place blocks can cross from one side to the other. The bottom third is the block field: red, green, blue, orange and purple blocks around two red vertical gate bars and two elbows, a blue one on the left and a purple one on the right, with a long yellow bar underneath. The counters read 16 and 27 across the top, 12 and 4 on the right, 26 and 7 on the left and 5 and 11 along the bottom. Open the 13 first. It is the only large tray away from the top edge, and filling it frees the lane that the 16 and the 11 both need.
Level 933
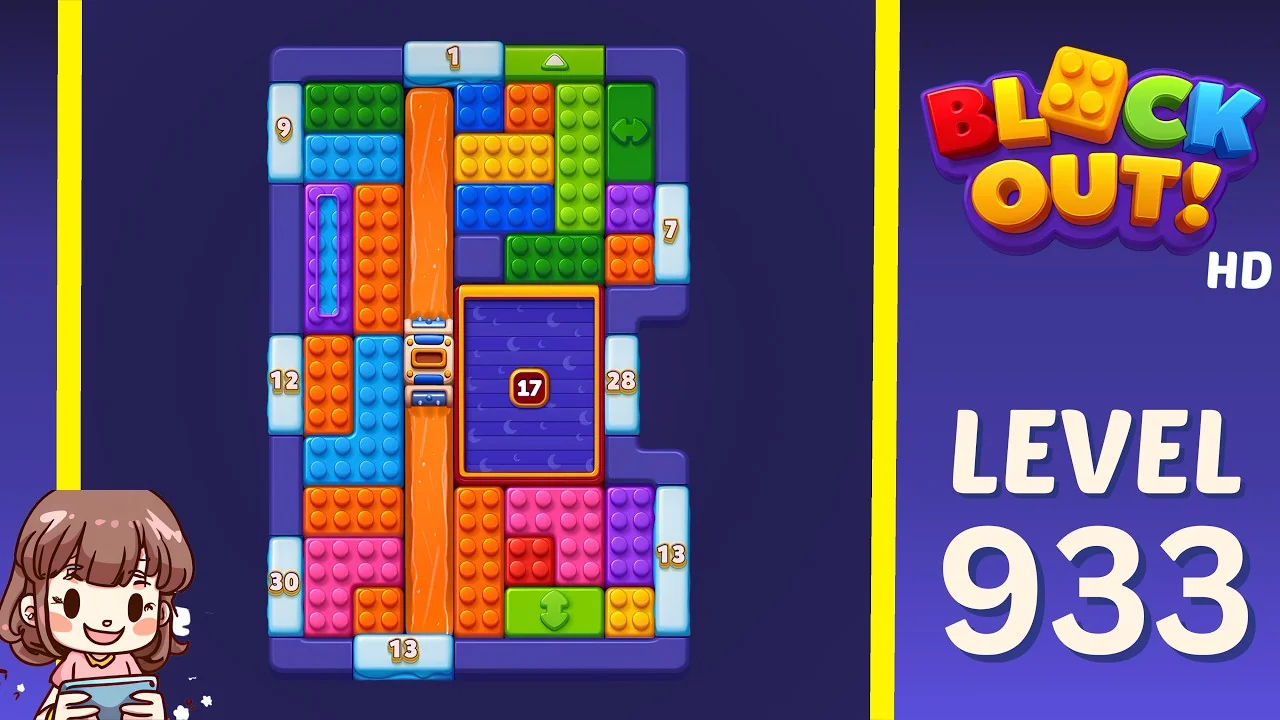
Open the Level 933 walkthrough or watch the video solution on YouTube.
A narrow board with one big tray: a purple 17 in the lower right, framed in orange and reachable only from its left side. An orange vertical bar runs the full height of the frame, splitting the field into two columns, and it has a small white slider assembly in the middle that feeds the 17 directly. The left column is a dense mix of green, blue, purple and orange with a long purple vertical bar; the right column is orange, pink, purple and blue with a green bar at the base and one green block with a face on it. The counters are 1 on top, 9 and 12 and 30 down the left, 7 and 28 and 13 down the right and 13 along the bottom. The 1 on top is a trap: it is the first counter the left column reaches, and if you feed it early the column has no drain left. Work the bottom 13 and 30 first and leave the 1 until the very end.
Level 934
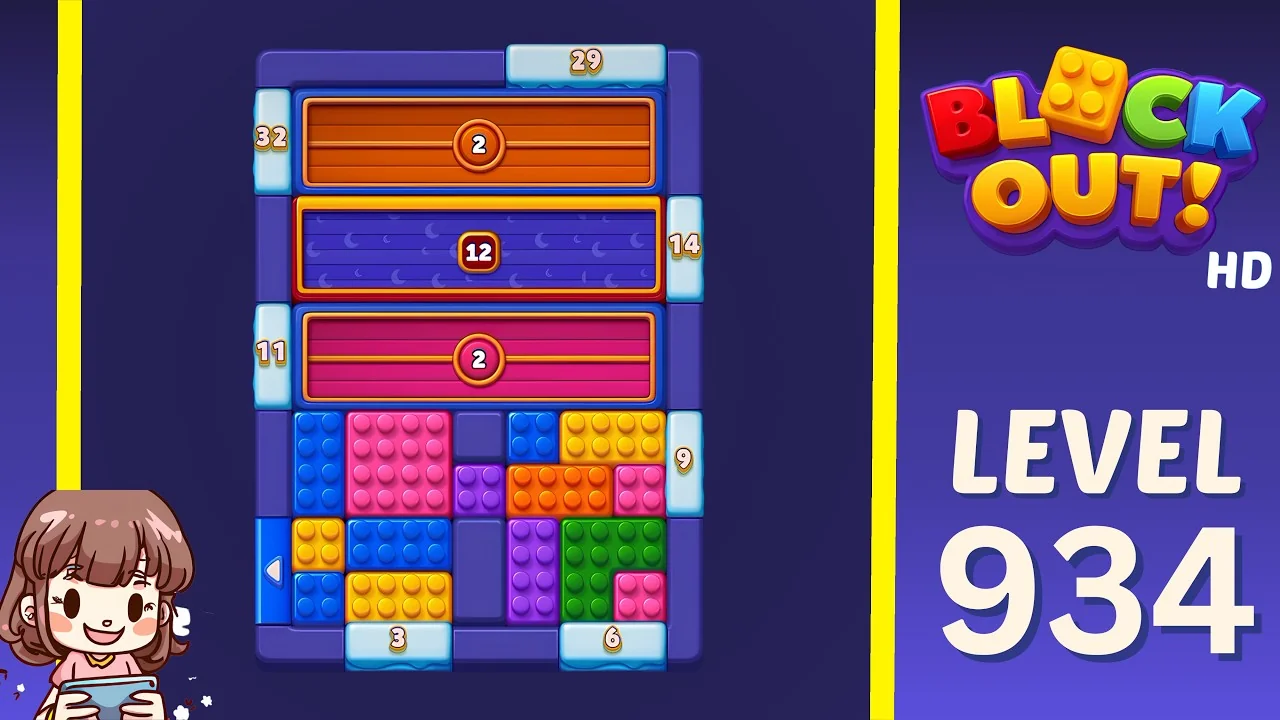
Open the Level 934 walkthrough or watch the video solution on YouTube.
Three wide horizontal trays stacked like shelves: an orange 2 across the top, a blue 12 in the middle and a pink 2 at the bottom, each one spanning nearly the whole width of the frame. Below them is the only block field, a low band of pink, blue, orange, purple and green blocks with two small arrow gates on the left edge and a grey column in the middle. The counters are 29 across the top, 32 and 11 on the left, 14 and 9 on the right, and 3 and 6 along the bottom. This board is a straight test of order: the 12 has to be filled before the two 2s, and the 2s are the only drains left once it is done. Feed the 12 from the right side, where the 14 counter gives it a lane, and keep the bottom band clear so the 3 and the 6 can finish what the pink 2 misses.
Level 935
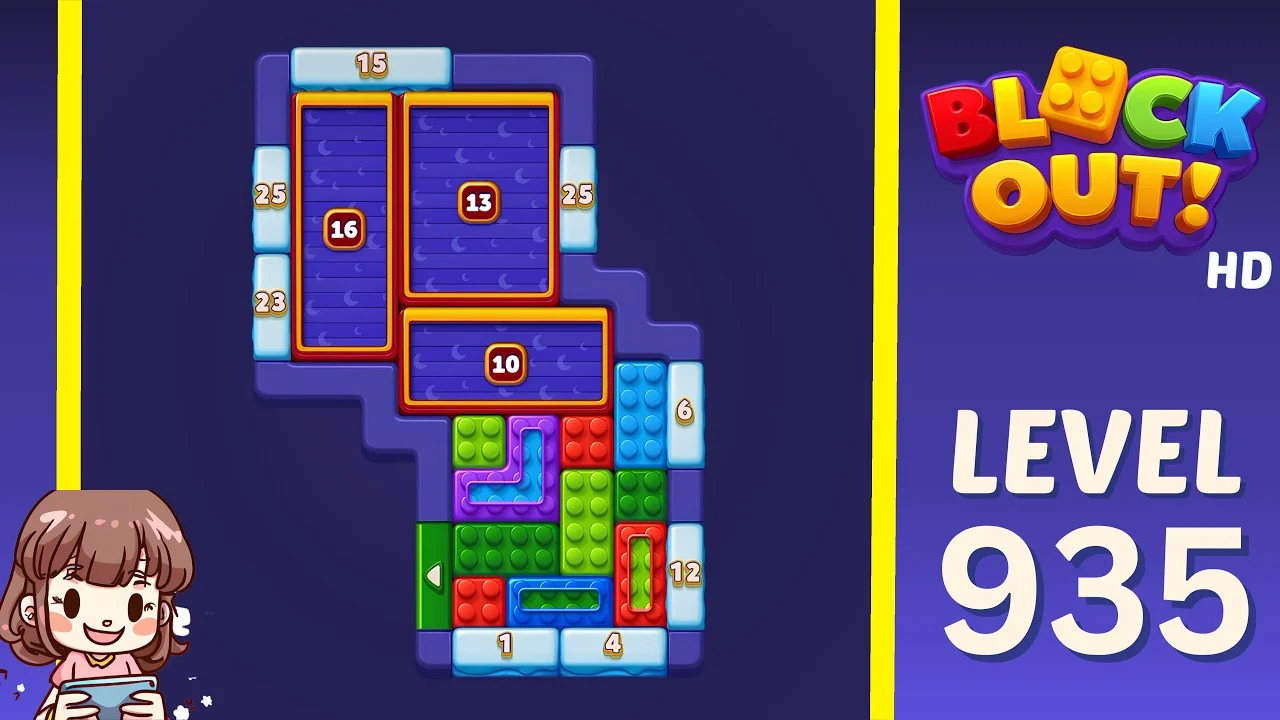
Open the Level 935 walkthrough or watch the video solution on YouTube.
Three purple trays in a stepped arrangement: a 16 on the upper left, a 13 on the upper right and a 10 below the 13, set back from the right edge. The frame is stepped to match, so the right side has a shoulder rather than a straight wall, and the whole block field is squeezed into the lower right corner: green, red, blue and purple blocks around a purple elbow and a small red and green gate pair. The counters read 15 on top, 25 and 23 down the left, 25 and 6 and 12 down the right, and 1 and 4 along the bottom. The 10 is the hinge. It sits between the field and the two upper trays, so every move in the corner has to pass it, and the 1 at the bottom is the last block on the board. Fill the 10 before either upper tray starts taking strays.
Level 936
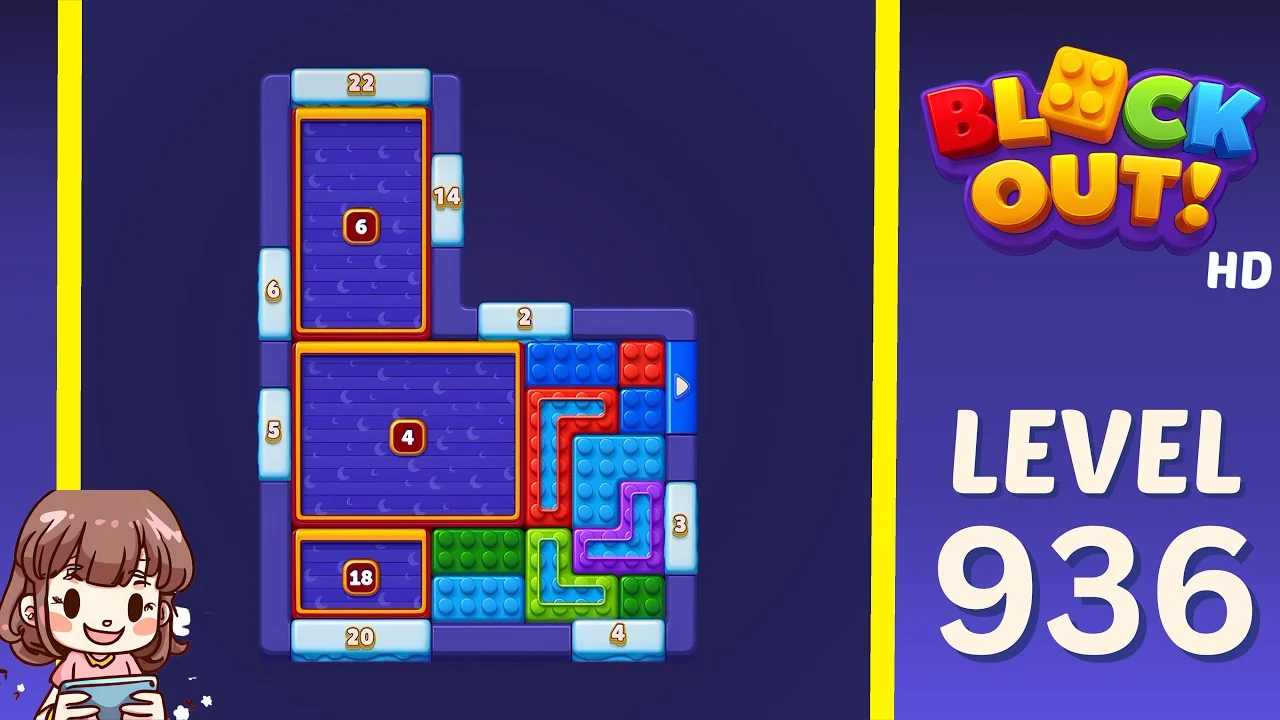
Open the Level 936 walkthrough or watch the video solution on YouTube.
An L-shaped board. The top arm is a vertical tray marked 6, the middle is a large square tray marked 4 and the bottom left is an 18, all three framed in orange and stacked against the left and top borders. The block field occupies the right side and the strip below the 4: blue, red, green and purple blocks with a red elbow in the upper part and a purple elbow lower down, plus a narrow blue vertical bar beside the 4. The counters are 22 on top, 6 and 5 down the left, 14 and 2 and 3 down the right, 20 and 4 along the bottom. The 4 in the middle is the biggest sink here but it is fenced on two sides, so it only starts working once the red elbow above it has been cleared. Clear the elbow, fill the 4, then let the 18 take the leftovers.
Level 937
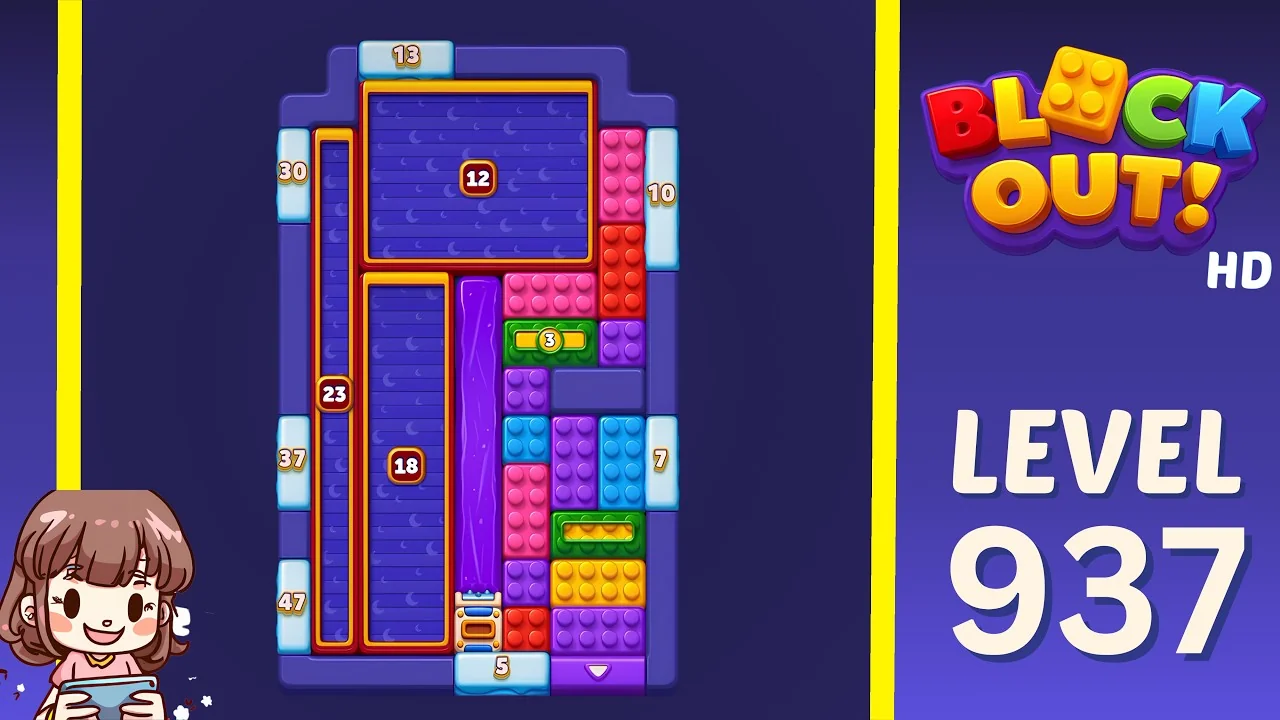
Open the Level 937 walkthrough or watch the video solution on YouTube.
The largest frame in the batch, and the one that puts every big tray on the left. A 12 spans the top, a tall 23 runs down the left column and an 18 sits in the middle, with a long purple vertical slider between the 23 and the field. The field itself is a narrow column on the right: pink, red, blue and purple blocks with two yellow horizontal bars, a green-headed gate and a red and blue slider pair at the bottom. The counters read 13 on top, 30 and 37 and 47 down the left, 10 and 7 on the right and 5 along the bottom. The 47 is the deepest sink in the run but it sits under the 23, so it only opens in the last third. Work the 12 from the top down, keep the purple slider clear, and use the 5 at the base as the finisher rather than an early outlet.
What to watch for on these boards
The video is a verified solve, not a script. The useful part is the shape of the board:
- Edge-mounted trays have one entrance. A tray pressed against the border can only be loaded from the side that faces the field, so clear that lane before anything else.
- A full-height slider is a divider, not a tray. Nothing crosses it, so the two halves of the board have to be finished separately.
- Shelf boards are order puzzles. When three wide trays are stacked, the middle one has to be filled before the outer two, or all three lanes close at once.
- Small counters at 1, 2 and 3 are finishers. Spend them on the last blocks, not the first.
- Restart without guilt. If no block has a tray that will take it, one more nudge will not make one.
How to use the walkthroughs
Every level from 932 to 937 has its own page with the board preview, difficulty rating and embedded video. A method that holds up on Expert boards:
- Watch only up to the first tray completing.
- Restart and replay that opening yourself.
- Keep going alone until you stall.
- Rewatch from the point your route went wrong, not from the start.
Browse all Block Out levels for the full library, or go back to the 926-931 log if you are still working through the previous batch.