Walkthrough editors
Block Out Levels 973-978: Stacked Shelf Columns and Two-Board Splits
Block Out Levels 973-978: 973 stacks three wide trays beneath a compact field, 974 keeps three deep trays and a purple dispenser, 975 pairs a tall well with a narrow strip, 976 uses three shallow shelves, 977 puts two deep trays beside a brick field, and 978 splits into a brick field and four stacked trays, with previews and video solutions for every level.
Related video walkthroughs
The library now runs to Level 978. 973 through 978 went up as one batch, all six rated Expert, and each one has a page on the site plus a video solution on YouTube. The previous batch was 967-972, so this picks up where that run ended.
The batch keeps the compact-field formula from the previous runs but changes where the storage sits. On 973 the field is a tight block across the top and three wide trays hang below it in a column; on 974 the field is reduced to a narrow strip of green, blue and orange bricks on the right, with three deep purple trays eating the rest of the frame; on 975 the field is the top edge and the whole lower half is storage. On 976, 977 and 978 the trays are wide and shallow rather than deep, which makes them easy to fill and slow to empty.
The shared cost across all six is order, not capacity. Almost every board here gives you enough tray space for the full field. What it does not give you is a spare lane: the trays are stacked in single columns, so the one you open first is the one the field must feed until it closes.
Levels 973-978 at a glance
| Level | Difficulty | Walkthrough | Video |
|---|---|---|---|
| Level 973 | Expert | Open the guide | Watch |
| Level 974 | Expert | Open the guide | Watch |
| Level 975 | Expert | Open the guide | Watch |
| Level 976 | Expert | Open the guide | Watch |
| Level 977 | Expert | Open the guide | Watch |
| Level 978 | Expert | Open the guide | Watch |
The six newest boards
Each entry below has the board preview, a link to its own page and the video solution. Watch only as far as the first tray completing, then restart and replay that part yourself before watching the rest.
Level 973
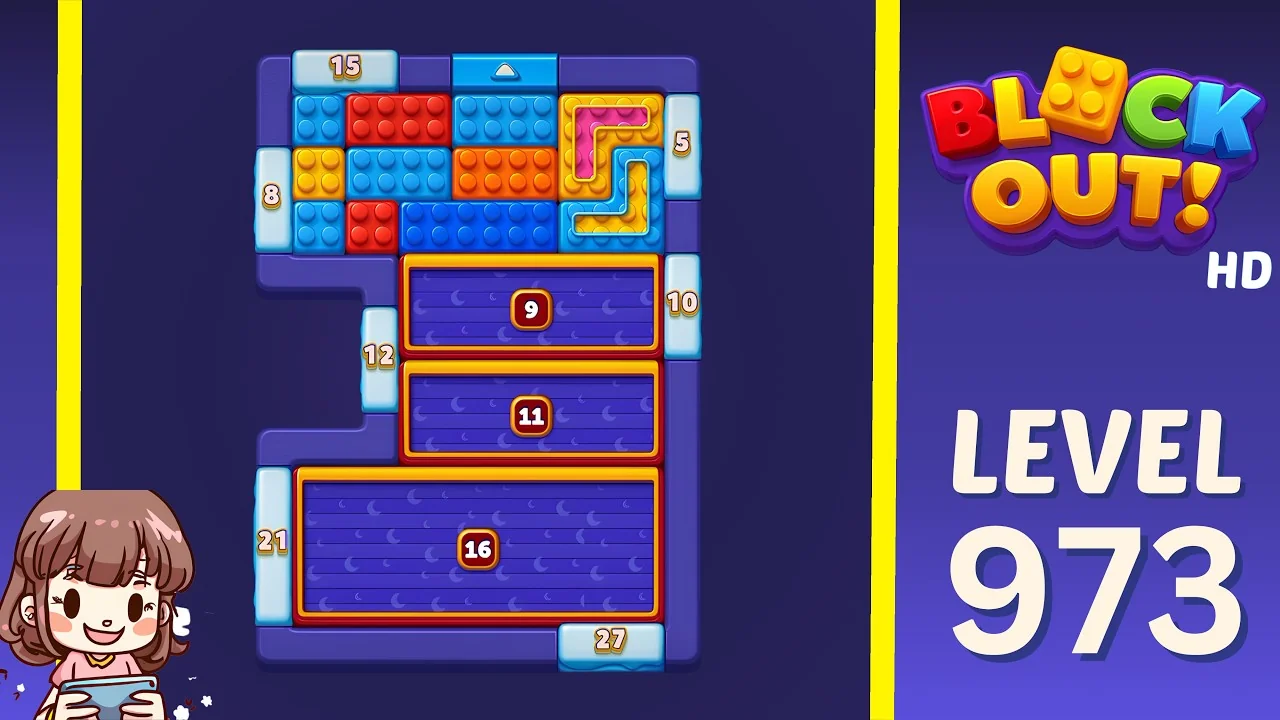
Open the Level 973 walkthrough or watch the video solution on YouTube.
The field is a tight rectangle across the top, counters 15 above, 8 on the left and 5 on the right. It is packed with red, blue and orange bricks, plus a yellow-and-orange snake piece on the right and a pink block tucked under it. Beneath the field sit three wide purple trays in orange frames, stacked vertically and marked 9, 11 and 16, with light-blue side counters reading 12 on the left and 10 on the right, 21 at the bottom left and 27 at the bottom. All three trays are longer than they are deep, so each one can take almost any colour but holds a lot of blocks once it does. The 9 is the only small tray: use it for the colour that is already crowded out, and keep the 16 for the last wide pass.
Level 974
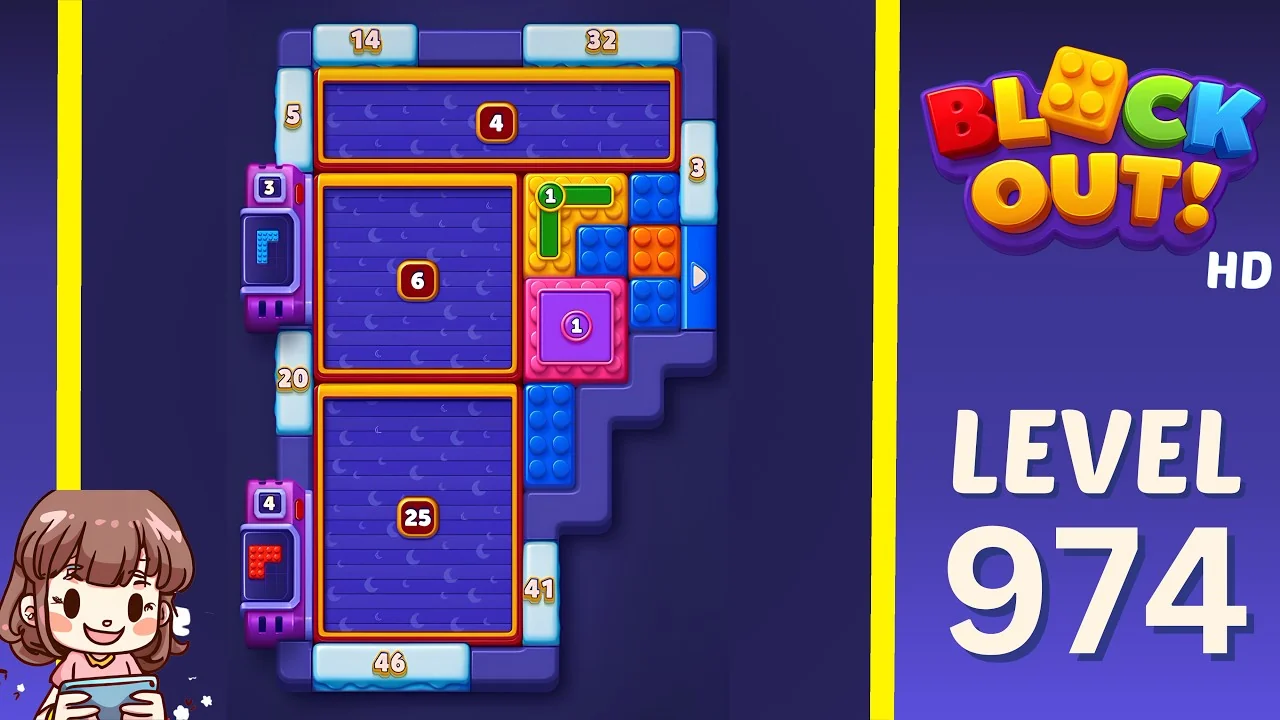
Open the Level 974 walkthrough or watch the video solution on YouTube.
Three deep purple trays dominate the frame: a wide 4 across the top, a 6 in the middle, and a tall 25 at the bottom, all in orange frames. The field is squeezed into the right-hand column: a green 1 tray and a green L piece at the top, then blue and orange bricks with a blue right-pointing arrow, a pink tray marked 1 below them, and a short blue brick run at the bottom. Counters read 14 and 32 across the top, 5 and 3 on the left and right, 20 on the left flank and 41 on the right, 46 at the bottom. Purple dispensers marked 3 and 4 cling to the left edge. The 25 is the deepest tray on the board and the 4 is the easiest to waste, so start the field through the 4 and leave the 25 for the colour that is slowest to clear.
Level 975
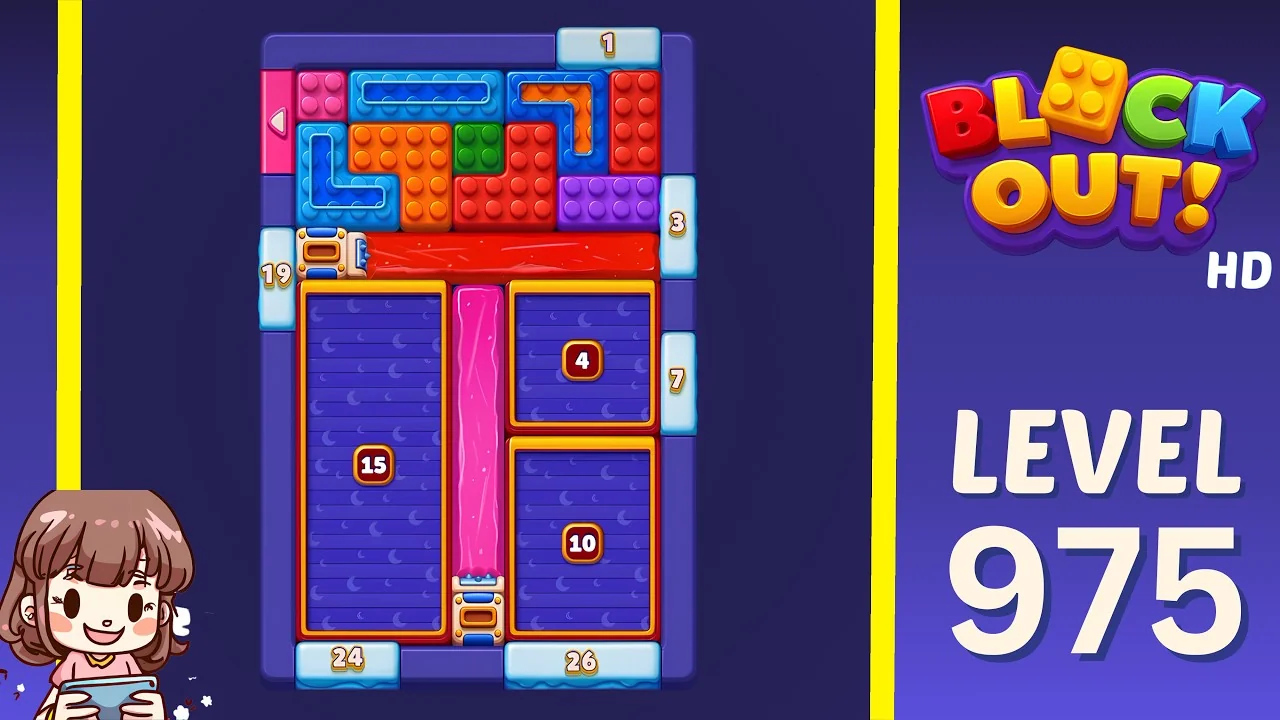
Open the Level 975 walkthrough or watch the video solution on YouTube.
The field is the top band: pink, blue, orange and red bricks with a blue Z piece, a purple block and a long red bar running underneath, with counters 1 above, 19 on the left and 3 on the right. Wooden gates sit at the bar's left end and again at the bottom of the middle strip. The lower half is storage: a tall purple tray marked 15 on the left, a narrow pink strip down the middle, and two stacked purple trays on the right marked 4 over 10, with 24 and 26 along the bottom. The long red bar is the only wide feed into the lower half, so whatever colour it releases first will own the tall 15. Fill the 4 and the 10 before the 15, or the well will take blocks the small trays can no longer reach.
Level 976
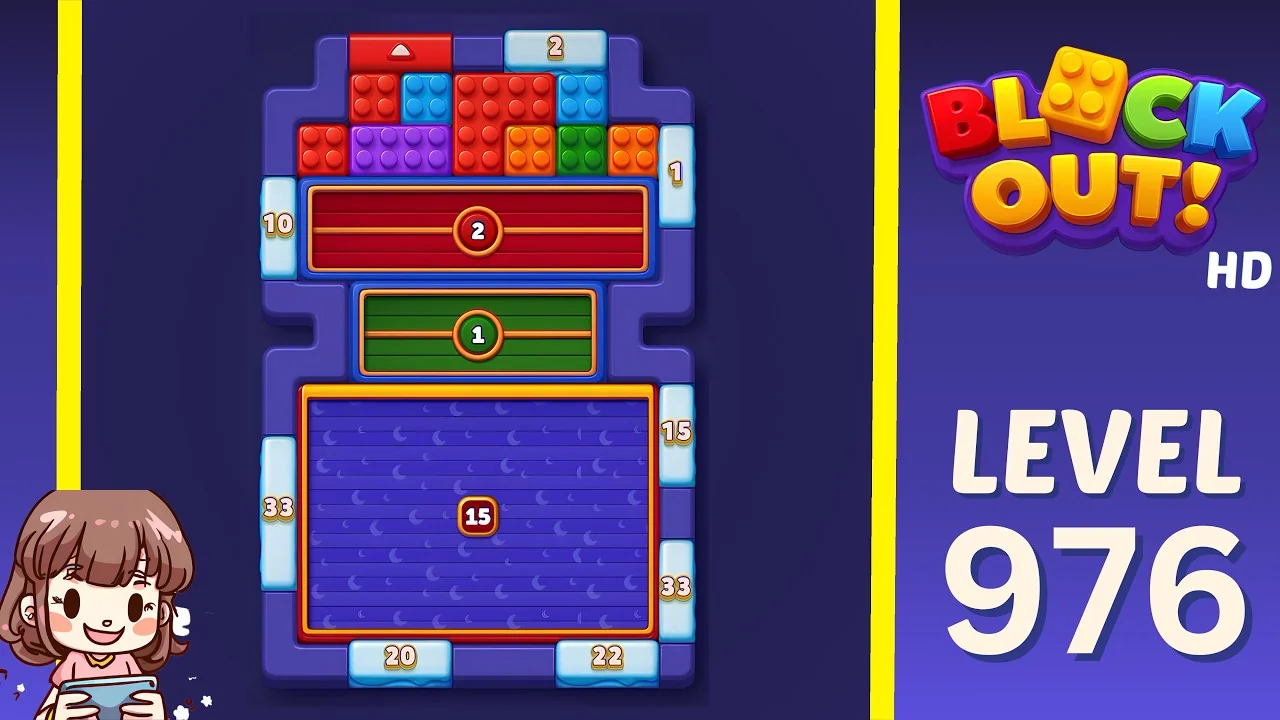
Open the Level 976 walkthrough or watch the video solution on YouTube.
Three shallow shelves are stacked down the middle: a wide red tray marked 2 in an orange frame, a narrower green tray marked 1 beneath it, and a large purple tray marked 15 at the bottom. The field is above them, a compact row of red, blue, orange, purple and green bricks beneath a red up arrow, with counters 2 above, 10 on the left and 1 on the right. The bottom counters read 15 and 33 on the right, 33 on the left flank, and 20 and 22 along the bottom edge. The up arrow means the field can only shed toward the top, straight into the red 2. Let that tray take one colour only, close it, and move down through the green 1 before the 15 starts collecting everything.
Level 977
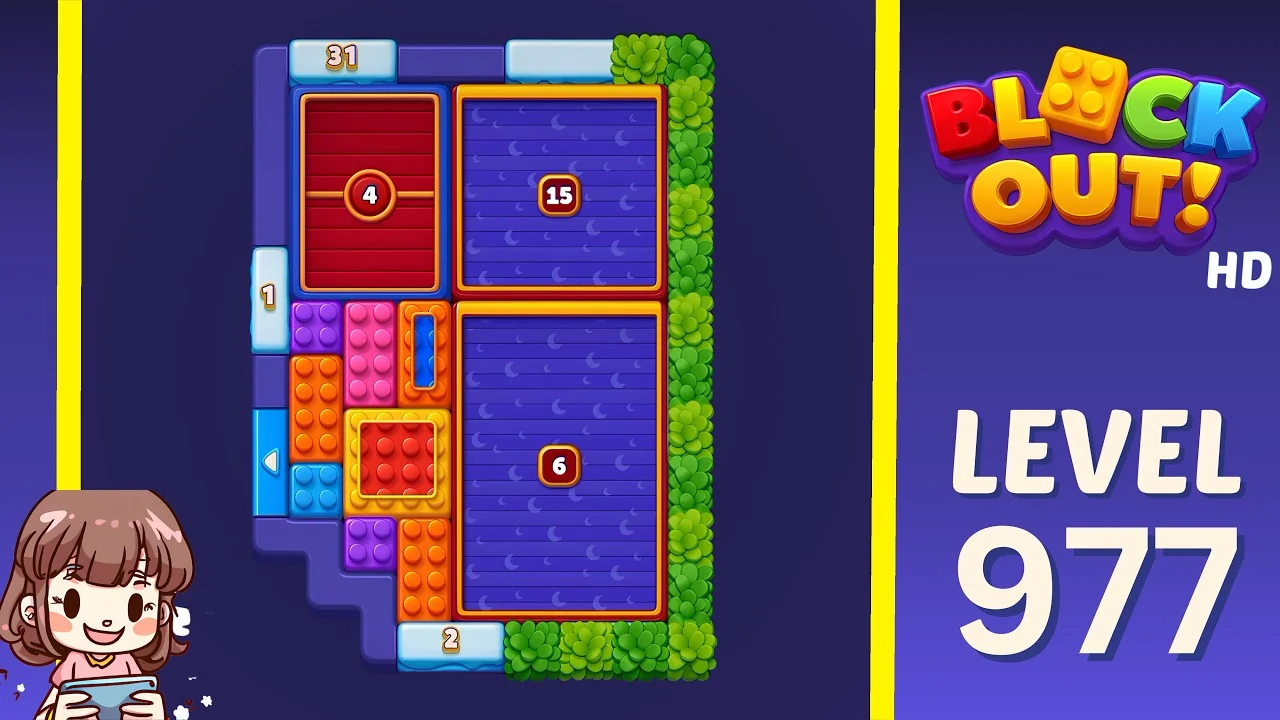
Open the Level 977 walkthrough or watch the video solution on YouTube.
Two deep purple trays fill the right side of the board, a 15 on top and a 6 below, both in orange frames. The left side is a red tray marked 4 across the top, a field of purple, pink and orange bricks beneath it, and a small red 2 piece set in an orange frame near the bottom, with a blue left arrow on the lower edge and a blue 5 piece above it. Counters read 31 above, 1 and 2 on the left, 2 at the bottom. A green vine runs down the right edge. This board has two storage lanes and no connector between them: the 4 and the 6 both open upward, while the 15 opens toward the field. Decide which of the two gets the field's main colour before you touch the 4, because the 4 cannot feed the 15.
Level 978
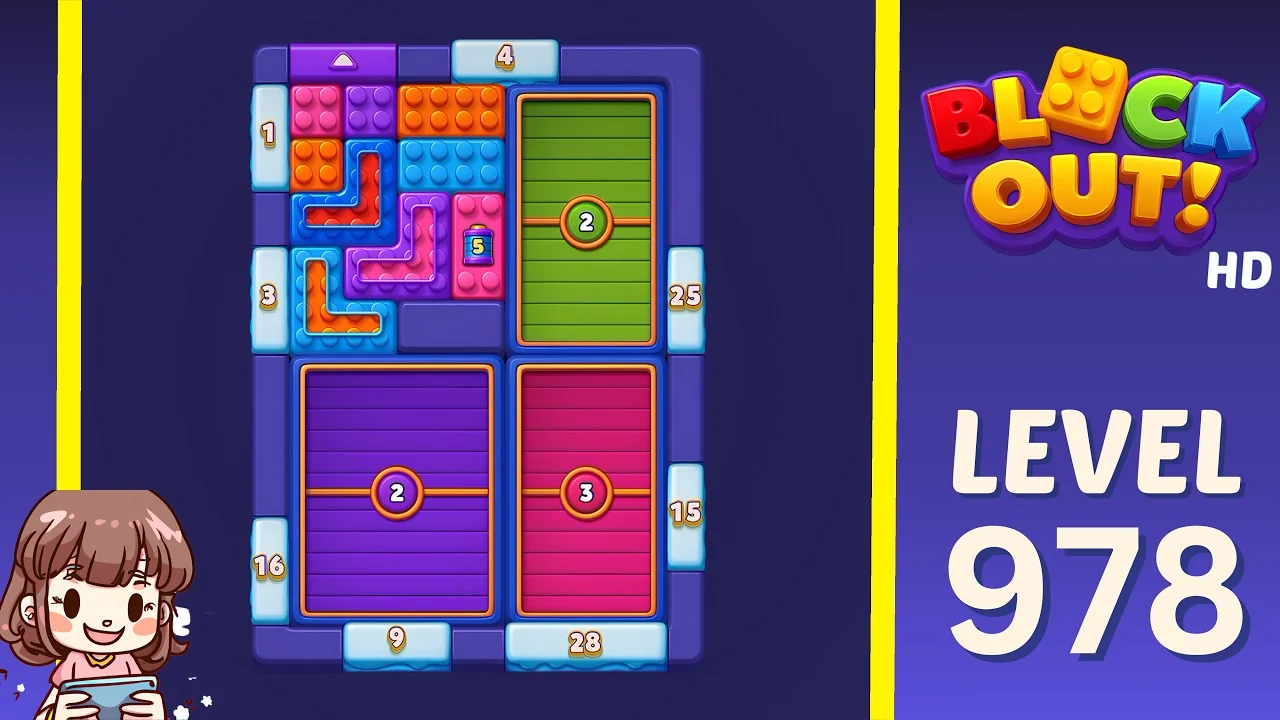
Open the Level 978 walkthrough or watch the video solution on YouTube.
The board splits into a field and a tray grid. The field occupies the upper left: purple, red, blue and orange bricks, a red-and-blue L-shaped piece, a pink tray marked 5 set into the bricks, and a purple up arrow at the top, with counters 1 and 3 on the left and 4 above. The upper right is a green tray marked 2 with 25 on its flank. The lower half is two wide trays side by side, a purple 2 on the left and a pink 3 on the right, with 16 on the left flank and 15 on the right, and 9 and 28 along the bottom. The 5 set into the field is the trap: it takes five blocks and then seals the lane beside it. Clear around it first, then feed it the colour that is already stacked next to it.
What to watch for on these boards
The video is a verified solve, not a script. The useful part is the shape of the board:
- One lane per column. The stacked trays on 973, 974 and 976 all open in the same direction, so the first tray you fill decides what the rest can accept.
- The deepest tray goes last. The 16 on 973, the 25 on 974 and the 15 on 975 are the widest landing zones on their boards; filling them early removes the only buffer.
- Shallow shelves are a queue. The 4 and the 2 on 976 and the 4 on 977 are easy to fill and slow to clear, which makes them order markers rather than storage.
- Trays inside the field cost lanes. The pink 5 on 978 is set into the bricks and seals its lane once full.
- No connector means no rescue. On 977 the two storage lanes do not feed each other, so a colour committed to the wrong one stays there.
How to use the walkthroughs
Every level from 973 to 978 has its own page with the board preview, difficulty rating and embedded video. A method that holds up on Expert boards:
- Watch only up to the first tray completing.
- Restart and replay that opening yourself.
- Keep going alone until you stall.
- Rewatch from the point your route went wrong, not from the start.
Browse all Block Out levels for the full library, or go back to the 967-972 log if you are still working through the previous batch.