Walkthrough editors
Block Out Levels 967-972: Tall Shelves, Stepped Chains and a Tray Lattice
Block Out Levels 967-972: 967 puts six one-cell trays inside its field, 968 and 969 use stepped tray chains, 970 splits into a brick column and three deep trays, 971 stacks four shallow shelves, and 972 pairs a small field with a lattice of blue trays, with previews and video solutions for every level.
Related video walkthroughs
The library now runs to Level 972. 967 through 972 went up as one batch, all six rated Expert, and each one has a page on the site plus a video solution on YouTube. The previous batch was 961-966, so this picks up where that run ended.
The batch keeps the bottom-field layout that dominated 961-966, but it stops using it as a single flat shelf. On 967 the field is at the bottom with two tall tray columns standing over it; on 968 and 971 the trays above the field are stacked in rows; on 969 the whole frame is inverted and the field drains downward into a stepped chain of trays instead of upward. The two outliers are 970, which has no wide field at all and instead puts a narrow brick column beside three deep framed trays, and 972, which splits into a compact field on top and a separate lattice of blue trays underneath.
The shared cost across all six is tray capacity. These boards rarely run out of colours to clear; they run out of places to put them, because the trays either sit in a narrow chain that only one lane can feed, or they hold small counts and lock after a handful of blocks. On 967 that problem is literal: six one-cell trays sit inside the field itself, each ready to take a single block and then block a lane.
Levels 967-972 at a glance
| Level | Difficulty | Walkthrough | Video |
|---|---|---|---|
| Level 967 | Expert | Open the guide | Watch |
| Level 968 | Expert | Open the guide | Watch |
| Level 969 | Expert | Open the guide | Watch |
| Level 970 | Expert | Open the guide | Watch |
| Level 971 | Expert | Open the guide | Watch |
| Level 972 | Expert | Open the guide | Watch |
The six newest boards
Each entry below has the board preview, a link to its own page and the video solution. Watch only as far as the first tray completing, then restart and replay that part yourself before watching the rest.
Level 967
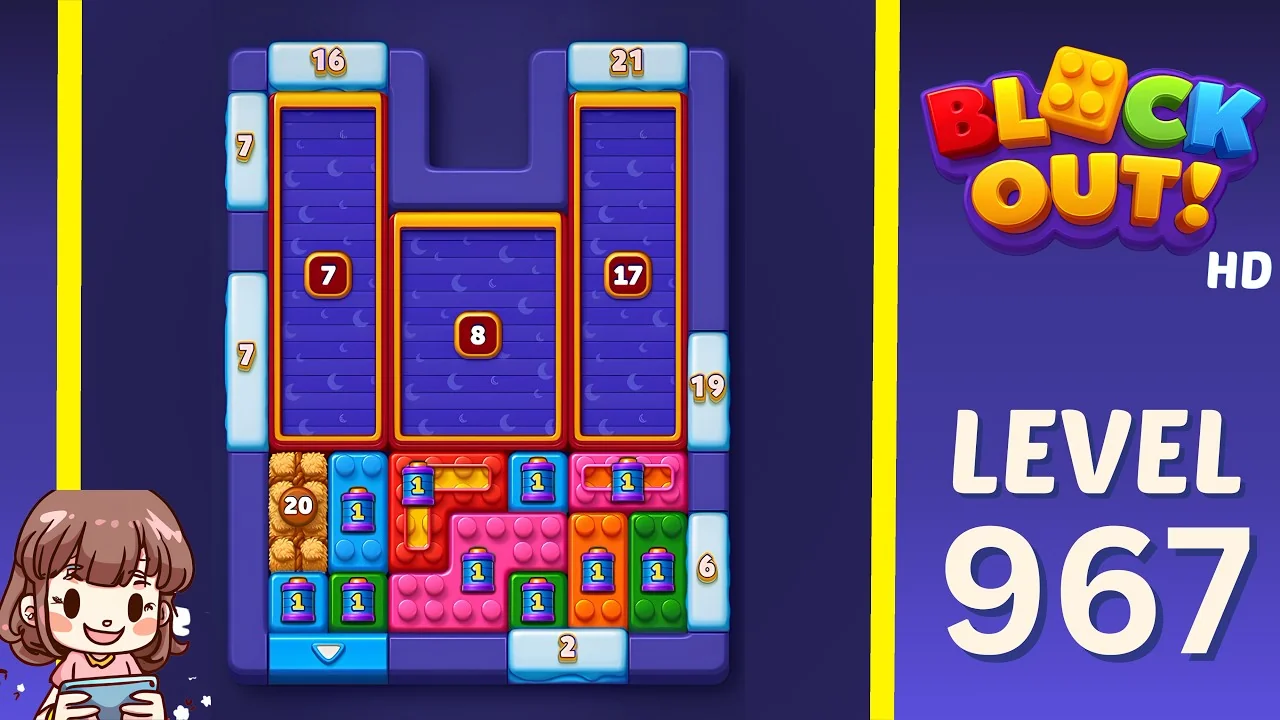
Open the Level 967 walkthrough or watch the video solution on YouTube.
Two tall purple trays in orange frames stand side by side over the field, a 7 on the left and a 17 on the right, with a shorter purple tray marked 8 set between them at mid-height. The counters read 16 and 21 across the top, 7 and 7 down the left flank and 19 on the right. The field below is a dense mix: tan bricks on the left with a 20 beside them, red bricks around a chocolate-bar piece, a large pink mass through the middle, a green column on the right with a 6, a yellow 2 at the bottom, and a blue down arrow gate in the bottom-left corner. Six small blue trays, each marked 1, are set into the field itself. Those six are the board: they accept a single block each and then sit full, so every time one of them is opened it costs a lane. Open them last, when the colour that belongs in each one is already adjacent, and use the tall 7 and 17 for the bulk of the field.
Level 968
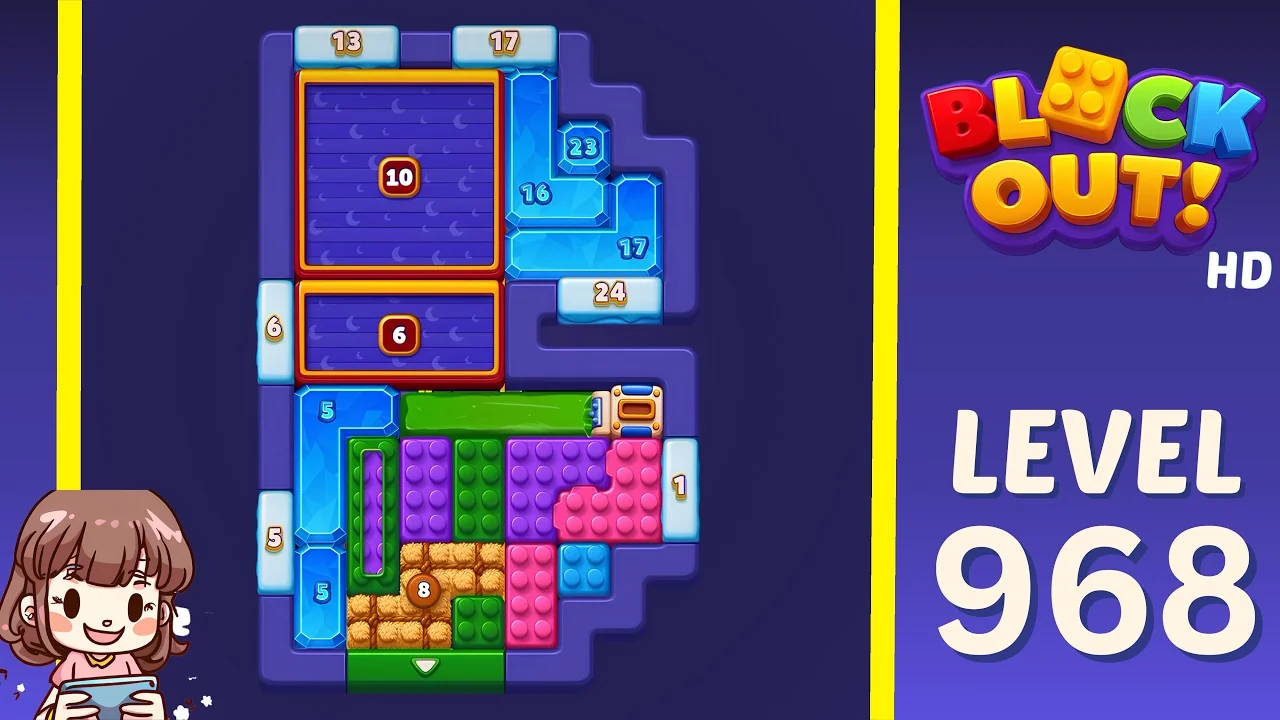
Open the Level 968 walkthrough or watch the video solution on YouTube.
A wide purple tray marked 10 in an orange frame fills the upper left, with a thin purple tray marked 6 directly beneath it. To their right, four light-blue trays step down the frame like a staircase, marked 16, 23, 17 and 24, with counters 13 and 17 above them. The left flank reads 6, 5 and 5. The field occupies the lower half: a light-blue tray marked 5 on the left edge, a long green piece across the top of the field, a wooden gate with a slider at its top right, purple, tan, pink and blue bricks below, a numbered 8 in the tan block, a 1 on the right edge and a green down arrow on the bottom edge. The staircase is the only route to the right side of the board, so whichever colour enters the 16 first will own that lane. Clear the long green piece early, while the 5 still has room, and keep the 10 as the wide landing zone for the second pass.
Level 969
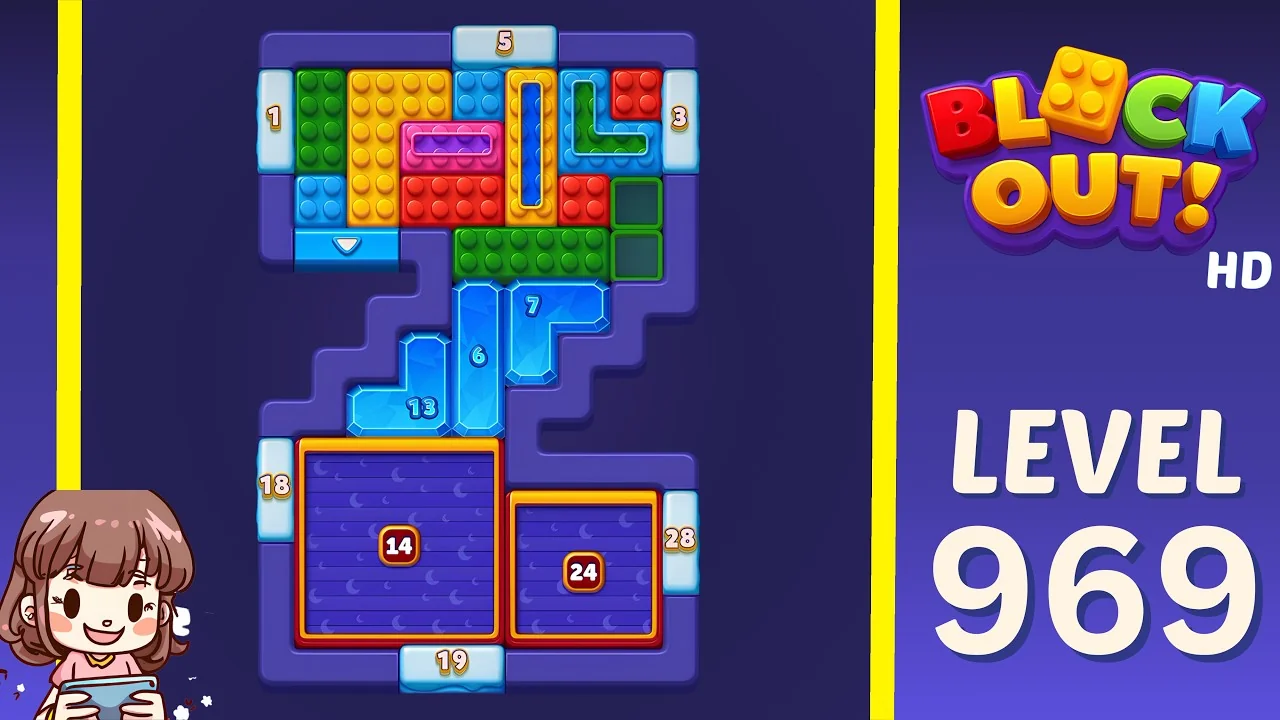
Open the Level 969 walkthrough or watch the video solution on YouTube.
This board is inverted. The field is at the top: green, orange, blue and red bricks packed together, two red special pieces in the middle, a purple chocolate-bar tray set horizontally, and counters 1 on the left, 5 above and 3 on the right. A blue down arrow sits at the field's lower-left edge. Below the field, a Z-shaped chain of purple trays steps down and left, marked 13, 6 and 7, before opening into two wide purple trays: a 14 in an orange frame on the left and a 24 on the right. The bottom counters read 18, 28 and 19. Because the field drains downward through a single arrow, the Z chain is a funnel rather than storage, and the 24 is the deepest tray on the board. Feed the 13 and the 6 in sequence and leave the 24 for the last colour, or it will fill with blocks the 13 can no longer reach.
Level 970
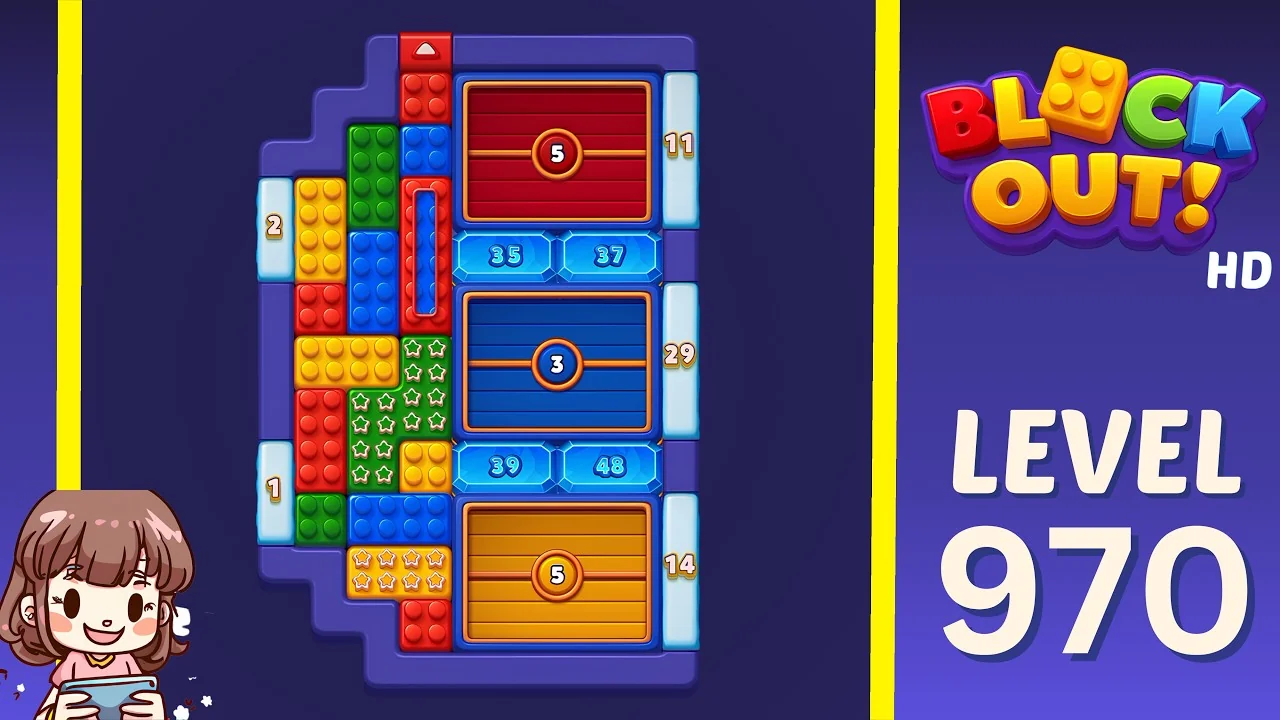
Open the Level 970 walkthrough or watch the video solution on YouTube.
There is no wide field here. A narrow column of bricks runs down the left side, topped by a red up arrow and built from blue, green, yellow and red pieces, including several shaped bricks with stars and notches that only fit specific gaps. Counters 2 and 1 sit on its flank. The right half is three deep framed trays stacked vertically: a red tray marked 5 at the top, a blue tray marked 3 in the middle and an orange tray marked 5 at the bottom, separated by narrow light-blue strips marked 35, 37, 39 and 48, with 11 and 29 to their right and a 14 beside the bottom tray. The strips are the only link between the column and the trays, and the up arrow means the column can only shed toward the top. Clear the shaped bricks before the strips start taking colours, because once a strip is committed the column has nowhere to go.
Level 971
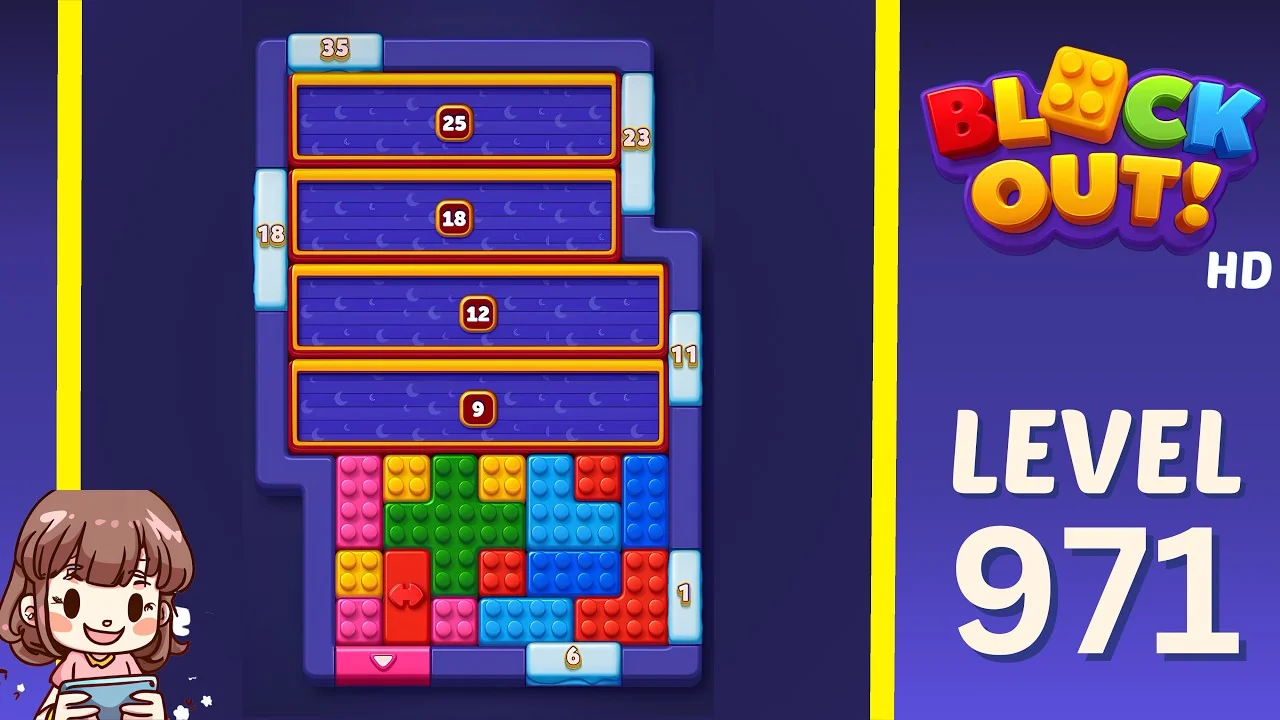
Open the Level 971 walkthrough or watch the video solution on YouTube.
Four wide, shallow purple trays in orange frames are stacked like a ladder across the top of the board, marked 25, 18, 12 and 9 from top to bottom. The counters read 35 above, 18 on the left, and 23 and 11 on the right. The field sits at the bottom, a broad mix of pink, blue, green and red bricks with a red special piece near the middle, a 1 on the right edge, a 6 at the bottom and a pink down arrow in the bottom-left corner. The ladder looks generous and is really a queue: all four trays are long enough to take almost any colour, so the temptation is to fill the top one first. Work upward instead, opening the 9 and then the 12, and keep the 25 for the widest pass once the field is already thinning.
Level 972
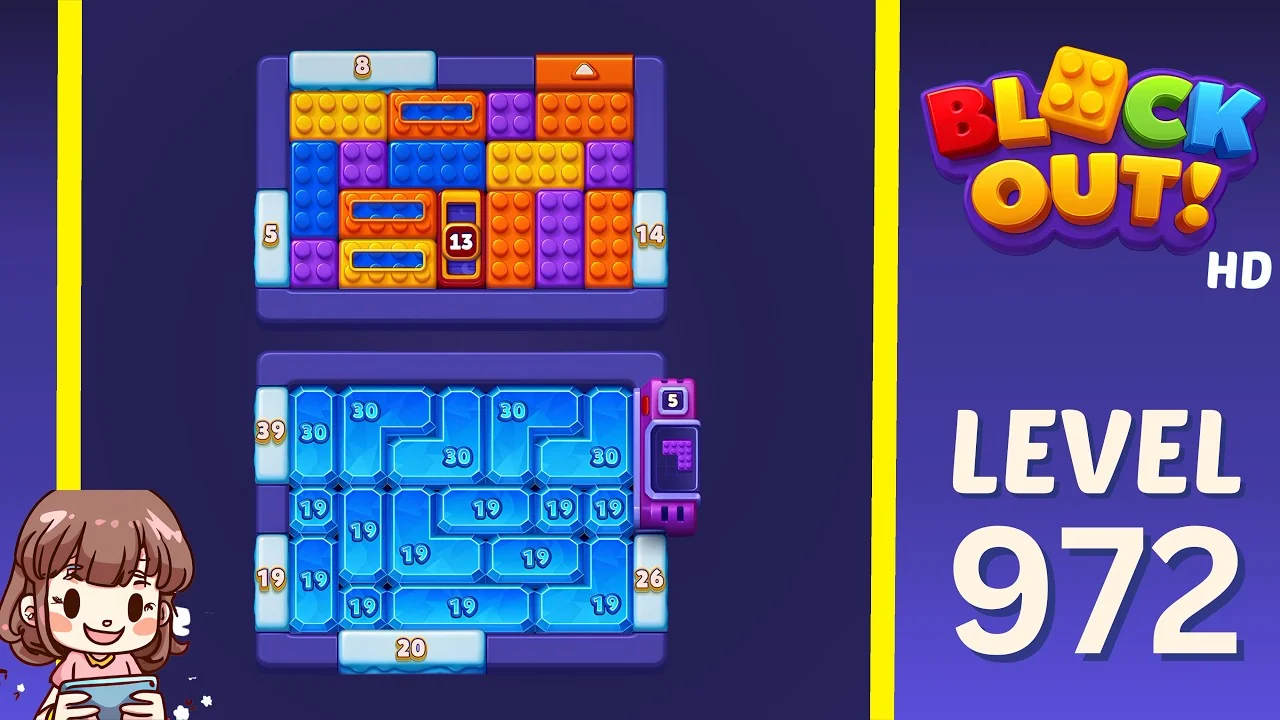
Open the Level 972 walkthrough or watch the video solution on YouTube.
The board is split in two. The upper half is a compact field of orange, purple and yellow bricks with chocolate-bar pieces, a 13 piece in the middle, counters 8, 5 and 14 on the flanks and an orange up arrow at the top. The lower half is a different structure entirely: a lattice of light-blue trays, four marked 30 across the top and a grid of 19s beneath them, with counters 39 and 26 on the sides and 20 at the bottom, and a purple dispenser marked 5 clipped to the right edge. The dispenser is the only thing connecting the two halves, which makes it the most valuable piece on the board. Route the field's colours through it deliberately, one colour at a time, and treat the 30 and 19 grid as the main reservoir rather than as overflow.
What to watch for on these boards
The video is a verified solve, not a script. The useful part is the shape of the board:
- Trays inside the field cost lanes. The six one-cell trays on 967 are not storage; each one blocks a route the moment it is full.
- Stepped chains serve one lane. The light-blue staircase on 968 and the Z chain on 969 each accept blocks from a single direction, so the first colour committed to them decides the rest of the board.
- Narrow strips are the only bridge. On 970 the 35, 37, 39 and 48 strips sit between the brick column and the deep trays, and the column can only shed upward.
- Shallow shelves are a queue. The four trays on 971 all take almost anything, which means the order you fill them in is the order you must empty them.
- One connector decides the board. On 972 the purple dispenser is the sole link between the field and the tray lattice.
How to use the walkthroughs
Every level from 967 to 972 has its own page with the board preview, difficulty rating and embedded video. A method that holds up on Expert boards:
- Watch only up to the first tray completing.
- Restart and replay that opening yourself.
- Keep going alone until you stall.
- Rewatch from the point your route went wrong, not from the start.
Browse all Block Out levels for the full library, or go back to the 961-966 log if you are still working through the previous batch.