Walkthrough editors
Block Out Levels 994-997: Three Wide Trays, a Split Field and a Castle Crown
Block Out Levels 994-997: 994 stacks trays of 28, 16 and 5 above a field packed with arrow pieces, 995 splits the board with a 5 over a 29 and 15 pair, 996 squeezes the field into an L around a tall 10, and 997 hangs a castle-shaped field over trays of 5, 6 and 1, with previews and video solutions for every level.
Related video walkthroughs
The library now runs to Level 997. 994 through 997 went up as one batch, all four rated Expert, and each one has a page on the site plus a video solution on YouTube. The previous batch was 990-993, so this picks up where that run ended.
This batch swings between two shapes. 994 and 995 both put wide, shallow trays in a stack and leave the field to one side, so storage is plentiful but every tray fills the same way. 996 and 997 go the other direction: the field wraps around the trays, and the trays themselves are tall and narrow. None of the four offers a clean field-on-top layout, and on all four the first tray you commit to decides where the rest of the board drains.
Levels 994-997 at a glance
| Level | Difficulty | Walkthrough | Video |
|---|---|---|---|
| Level 994 | Expert | Open the guide | Watch |
| Level 995 | Expert | Open the guide | Watch |
| Level 996 | Expert | Open the guide | Watch |
| Level 997 | Expert | Open the guide | Watch |
The four newest boards
Each entry below has the board preview, a link to its own page and the video solution. Watch only as far as the first tray completing, then restart and replay that part yourself before watching the rest.
Level 994
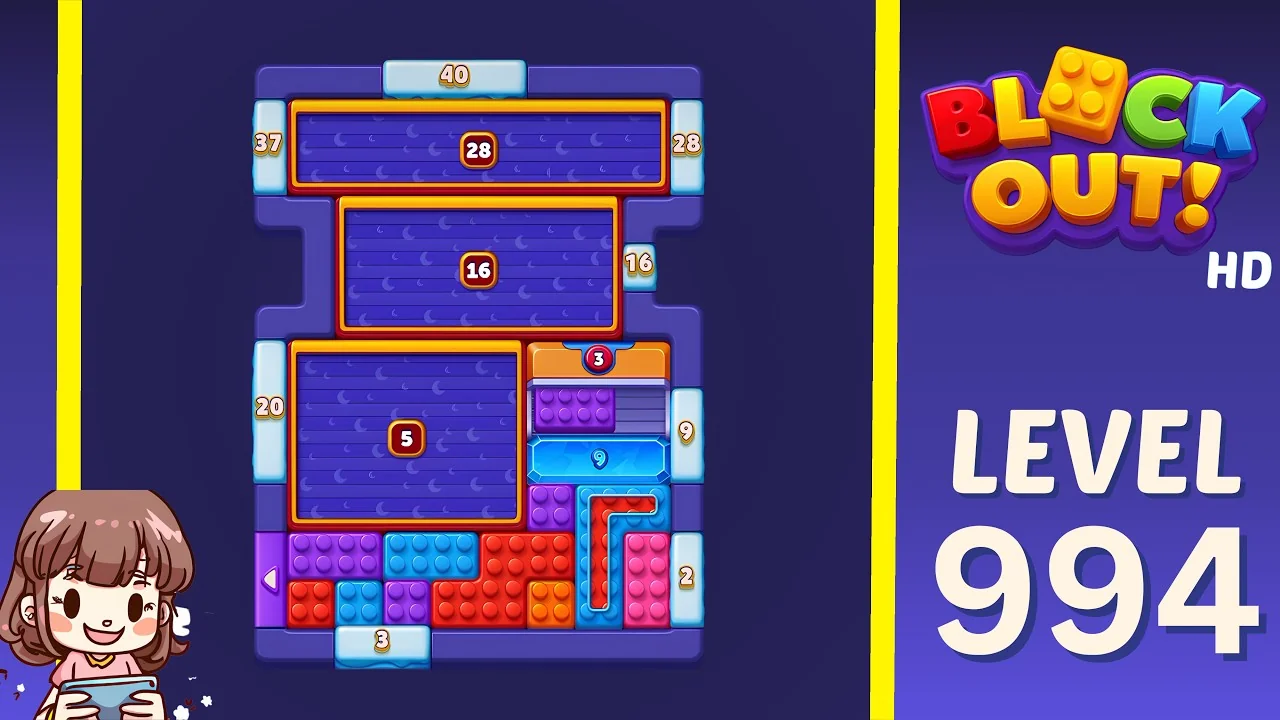
Open the Level 994 walkthrough or watch the video solution on YouTube.
Three wide trays sit above and beside a packed field. A long purple tray marked 28 runs across the top under the 40 counter, a shorter purple tray marked 16 sits directly below it, and a big square purple tray marked 5 fills the left side above the field, with an orange tray marked 3 and a small blue tray marked 9 stacked on the right edge. Counters read 40 along the top, 37 and 20 down the left, 28 and 16 on the right, 9 and 2 further down the right, and 3 along the bottom. The field itself is the crowded lower strip: blue, purple, red and orange bricks with a pink column on the right and a purple left arrow at the bottom left. Because the 28, the 16 and the 5 all face the same edge, they all receive the same clears. Keep the 5 for the colour that floods the lower rows and let the 28 take the mixed upper clear, otherwise the big tray becomes dead space.
Level 995
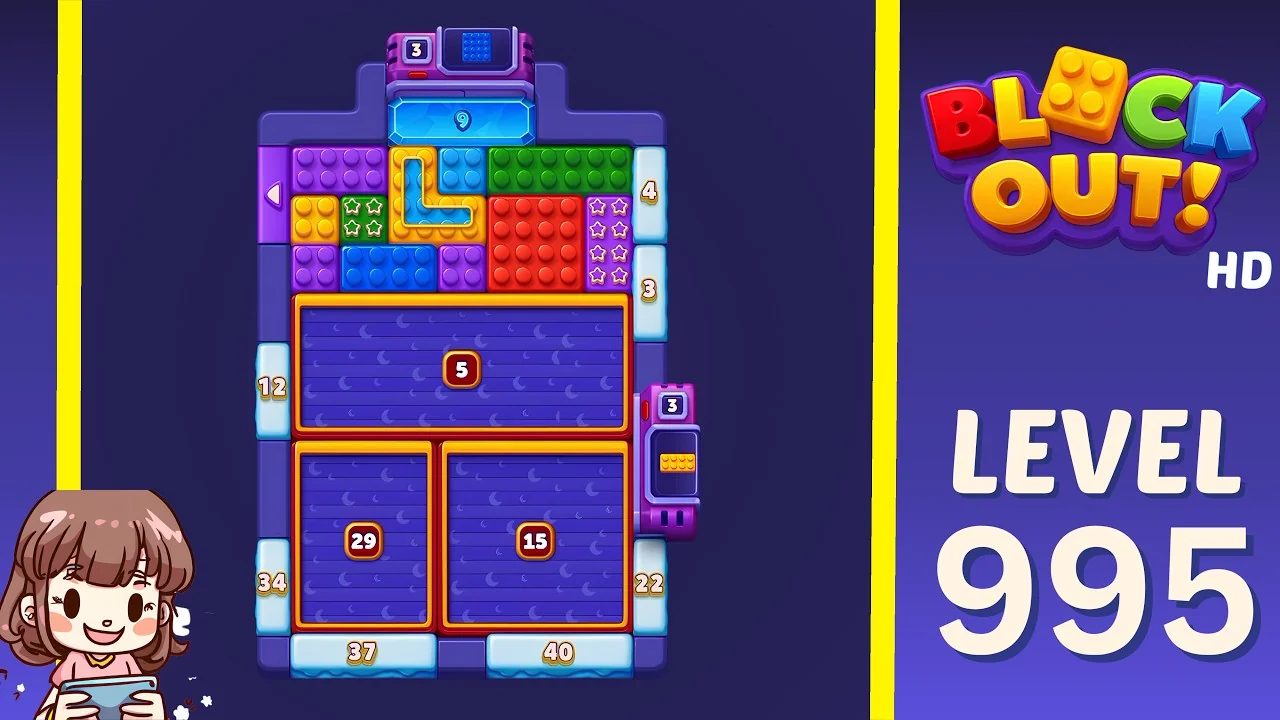
Open the Level 995 walkthrough or watch the video solution on YouTube.
The field takes the upper left and the storage is split down the middle. A wide purple tray marked 5 runs across the centre of the board; beneath it a purple tray marked 29 and another marked 15 sit side by side, and a small purple tray marked 3 hangs on the right edge. Counters read 9 along the top, 12 and 34 down the left, 4 and 3 on the upper right, 37 and 40 along the bottom and 22 on the lower right. The field is dense: purple bricks along the upper left, a yellow L piece and a blue square in the middle, green and red bricks on the right with pink bricks stacked beside them, a blue 9 tray set into the top edge and a purple left arrow on the left border. The split matters more than the numbers: the 29 and the 15 open in different directions, so the same clear cannot fill both. Load the 15 first with the tight right-side colours and keep the 29 for the broad purple and blue runs.
Level 996
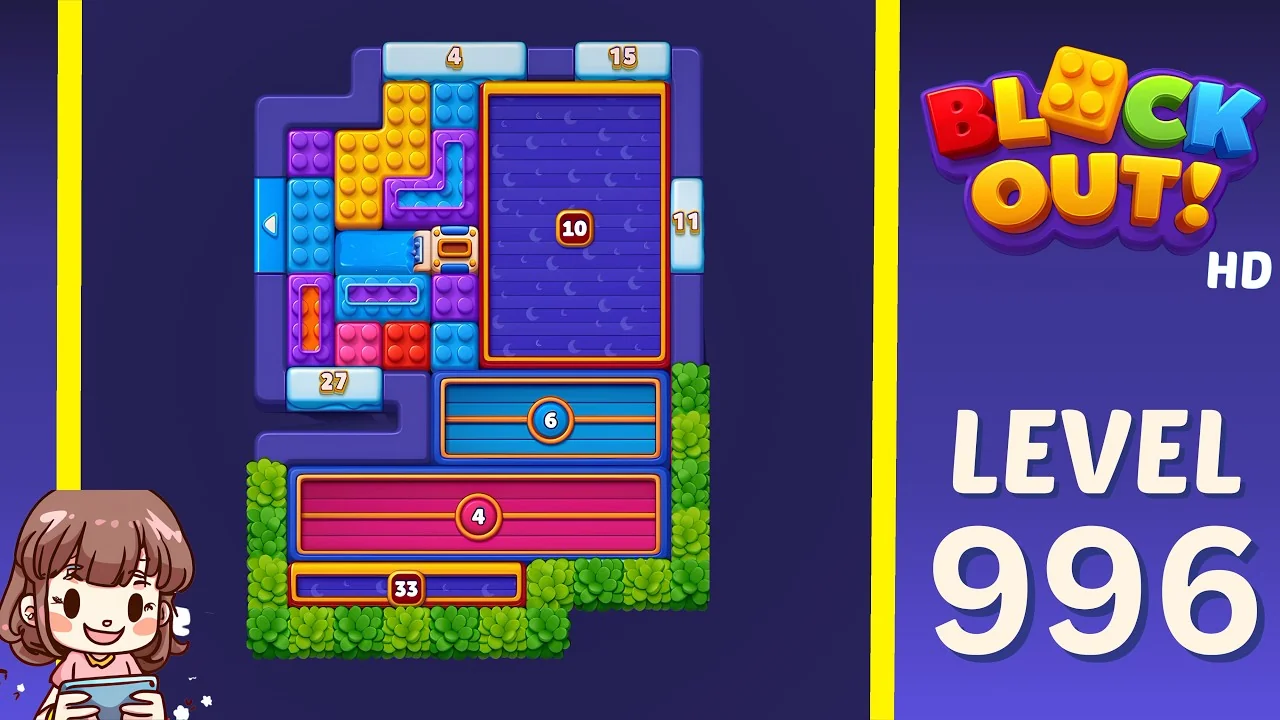
Open the Level 996 walkthrough or watch the video solution on YouTube.
The board is an L: a small field on the upper left and a tall purple tray marked 10 on the right, with the lower half given over to storage. The 10 is the tallest tray on the board, flanked by an 11 counter on its right edge and a 4 and a 15 along the top. Below it sit a blue tray marked 6, a wide pink tray marked 4 and a narrow blue tray marked 33, and a blue tray marked 27 sits under the field on the left. Counters read 27 on the left, 4 and 15 across the top and 11 on the right. The field holds orange bricks along the top, purple and blue bricks down the left, a yellow 17 piece and a blue long piece in the middle, red bricks at the bottom and a purple left arrow on the boundary. The 10 accepts the field's whole right column, so it is the tray that decides the opening: start there with the orange and red bricks and leave the 33 for the very last narrow clear.
Level 997
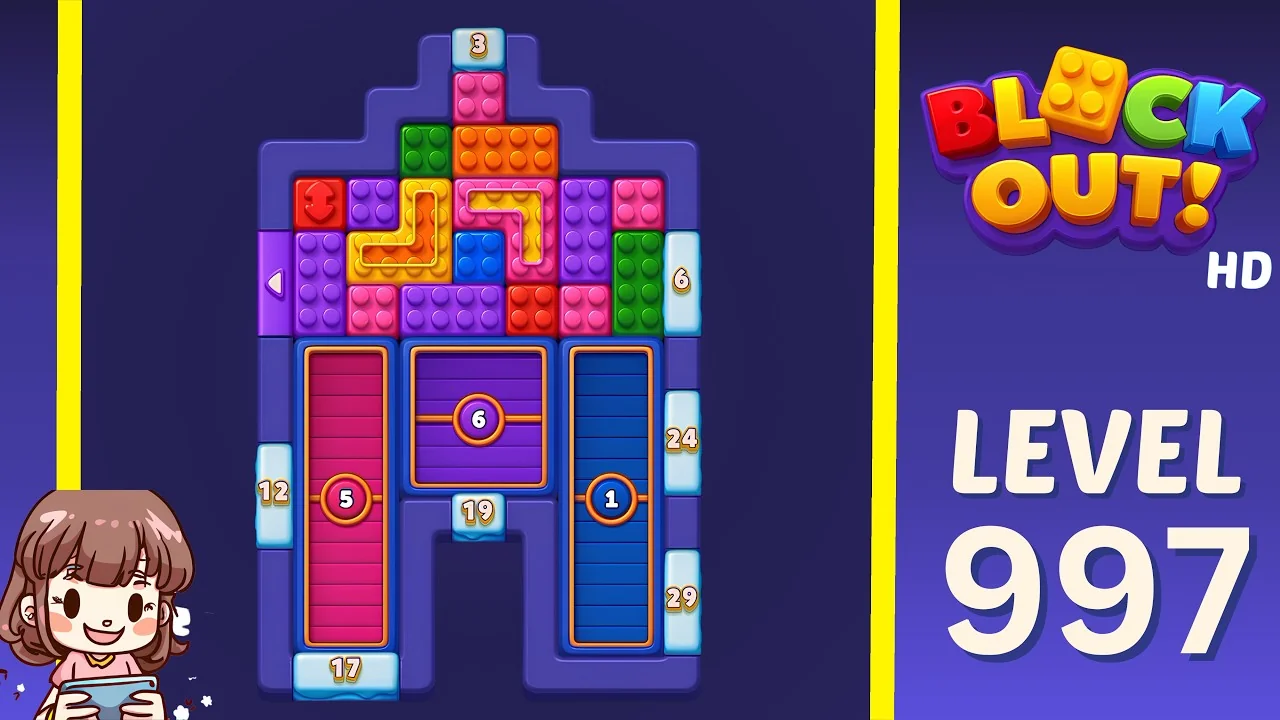
Open the Level 997 walkthrough or watch the video solution on YouTube.
A castle-shaped field sits on top of three tall trays. The field steps up into a crown at the top: green and orange bricks across the upper row, purple, yellow and pink bricks with a red round piece on the left, a yellow S piece and an orange piece in the middle, a blue cube and green column on the right and a purple left arrow on the left border. Storage is three vertical trays beneath it: a tall pink tray marked 5 on the left, a purple tray marked 6 in the middle and a tall blue tray marked 1 on the right. Counters read 3 along the top, 12 down the left, 6 and 24 on the upper right, 29 on the lower right, 17 and 19 along the bottom. The crown only releases bricks through the two side notches, so the 5 and the 1 fill from opposite ends and the middle 6 catches everything that drops straight down. Commit the 6 to one colour family early; once it is mixed, the two outer trays cannot take the overflow.
What to watch for on these boards
The videos are verified solves, not scripts. The useful part is the shape of each board:
- Wide trays facing one edge fill in order. The 28, 16 and 5 on 994 all see the same clear, so a bad first drop ruins the largest tray on the board.
- Split storage needs two colours, not two halves. The 29 and 15 on 995 open away from each other; treat them as separate boards.
- A field that wraps the trays inverts the usual plan. On 996 the tall 10 is not spare space, it is the main lane.
- A crown field drains through its notches. On 997 the 5 and the 1 fill from the outside in, which leaves the middle 6 as the only flexible tray.
- Small trays are last-resort, not spare. The 3s and 9s on 994 and 995 sit where the field narrows, and they are the first to be wasted.
How to use the walkthroughs
Every level from 994 to 997 has its own page with the board preview, difficulty rating and embedded video. A method that holds up on Expert boards:
- Watch only up to the first tray completing.
- Restart and replay that opening yourself.
- Keep going alone until you stall.
- Rewatch from the point your route went wrong, not from the start.
Browse all Block Out levels for the full library, or go back to the 990-993 log if you are still working through the previous batch.