Walkthrough editors
Block Out Levels 949-954: A Four-Tray Stack, Twin Columns and a Zigzag Frame
Block Out Levels 949-954: a field above four stacked trays, two tall columns with one field and three trays between them, a zigzag board and a four-tray frame around a bottom field, with previews and video solutions for every level.
Related video walkthroughs
The library now runs to Level 954. 949 through 954 went up as one batch, all six rated Expert, and each one has a page on the site plus a video solution on YouTube. The previous batch was 944-948, so this picks up where that run ended.
The 940s were built on twin trays above a thin band, with the frame doing the work: a notch here, a step there. This batch keeps the tray count high but stops putting the field in a band. On 949 and 950 the field sits at the top and the trays occupy the whole lower half, four of them on 949 and five on 950. 951 goes the other way and splits the board into two tall columns, one carrying the field and a single tray, the other carrying two large trays stacked with nothing else. 952 bends the frame into a zigzag and threads the field through the middle. 953 and 954 close the batch with wide trays above the field and small dispensers attached to the outer frame.
The interesting change is the dispensers. On 950, 953 and 954 there are small counter trays pressed against the side of the frame, separate from the main trays and easy to forget. Each one holds a few blocks and stops accepting the moment it fills, so a board that looks like it has spare capacity usually has less.
Levels 949-954 at a glance
| Level | Difficulty | Walkthrough | Video |
|---|---|---|---|
| Level 949 | Expert | Open the guide | Watch |
| Level 950 | Expert | Open the guide | Watch |
| Level 951 | Expert | Open the guide | Watch |
| Level 952 | Expert | Open the guide | Watch |
| Level 953 | Expert | Open the guide | Watch |
| Level 954 | Expert | Open the guide | Watch |
The six newest boards
Each entry below has the board preview, a link to its own page and the video solution. Watch only as far as the first tray completing, then restart and replay that part yourself before watching the rest.
Level 949
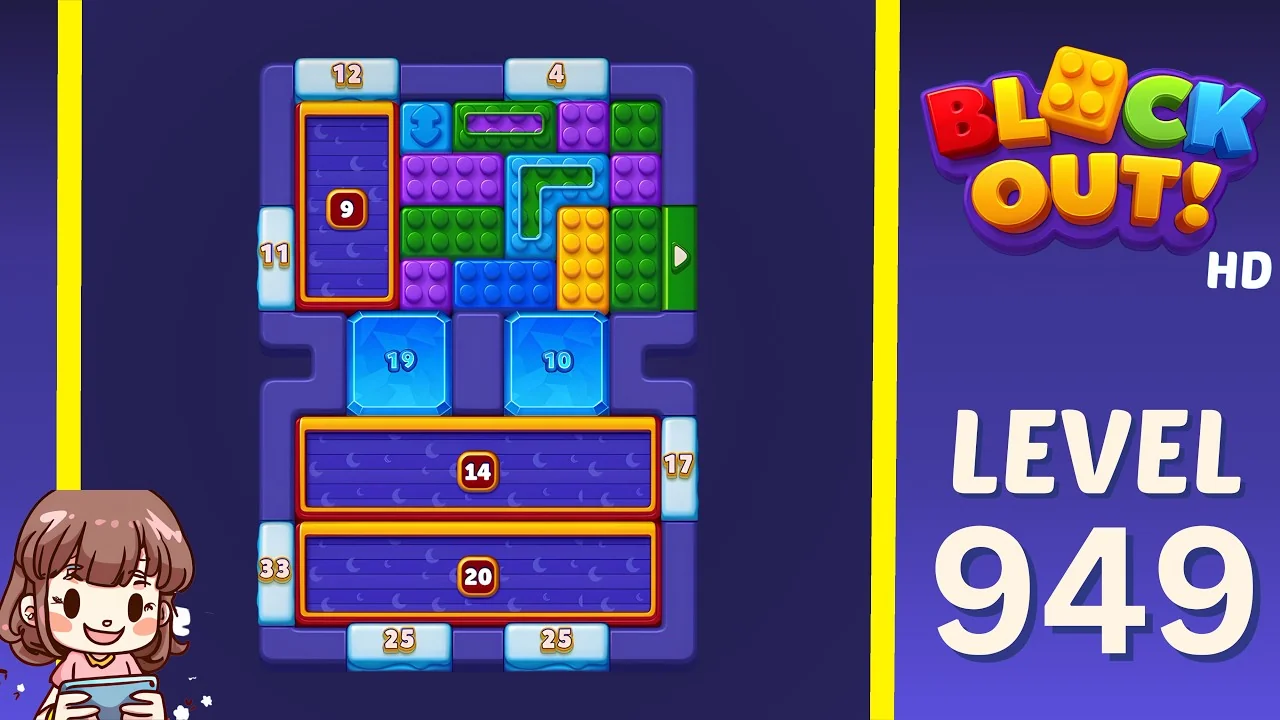
Open the Level 949 walkthrough or watch the video solution on YouTube.
The field sits at the top left, with a tall purple tray marked 9 built into its left edge inside an orange frame, and a green right arrow gate on the outer right edge. The field is purple, green and pink bricks with a purple horizontal slider near the top and a cyan L lower down. The whole lower half is trays: two blue ones side by side marked 19 and 10, then two wide purple ones stacked marked 14 and 20, each in an orange frame with a bar across its middle. The counters read 12 and 4 across the top, 11 down the left, 17 beside the 14, 33 beside the 20, and 25 and 25 along the bottom. Four trays below one field means the field empties downward fast, so the 9 has to be opened from the left before the top rows are gone. The two wide trays are the last resort, not the opening.
Level 950
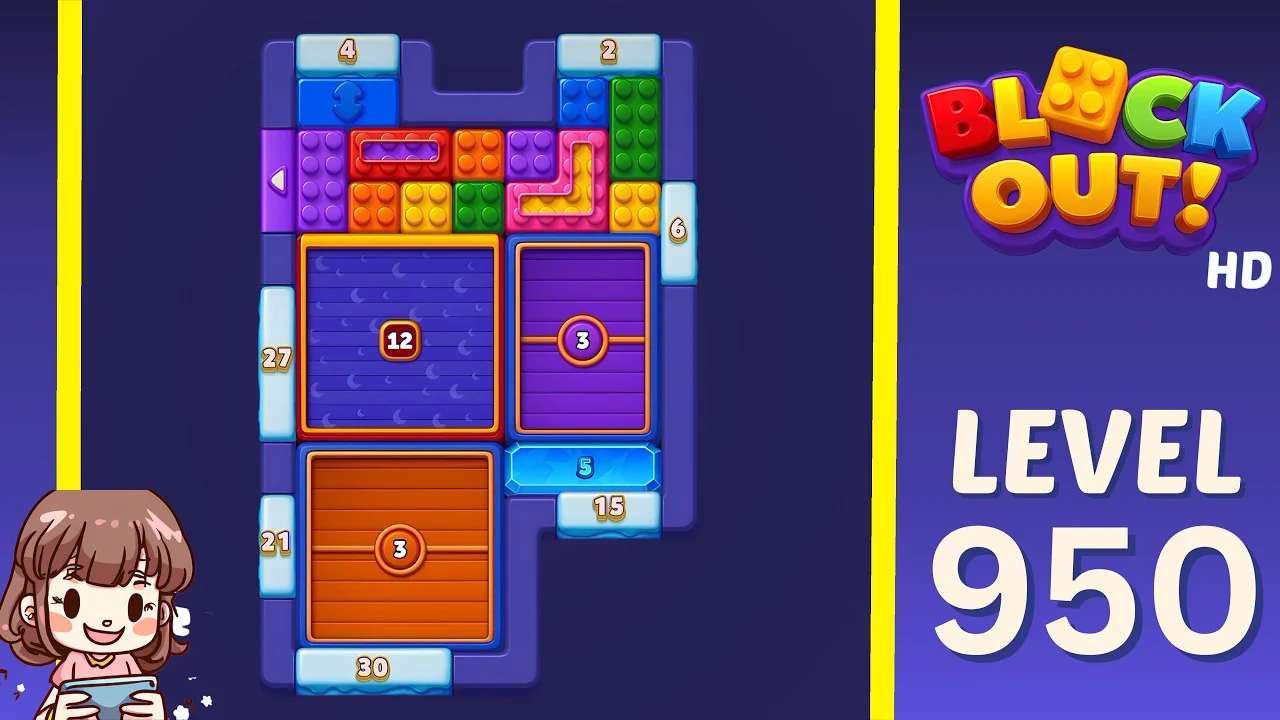
Open the Level 950 walkthrough or watch the video solution on YouTube.
A field at the top with a purple left arrow gate on its left edge, packed with purple, red, orange, green and pink bricks, a red horizontal slider and a pink L, plus a small mint tray attached to the right side marked 6. Below the field: a blue tray marked 12 and a purple tray marked 3 standing side by side, both in orange frames. Below those: a wide orange tray marked 3, and beside it a light blue tray marked 5 sitting above a light blue tray marked 15. The counters read 4 and 2 along the top, 27 and 21 down the left, 6 on the right and 30 along the bottom. Five trays under one field is the widest outlet this batch offers, and the 6 on the right edge is the trap: it fills from the far right column only, so spending the right side early strands whatever is left up there.
Level 951
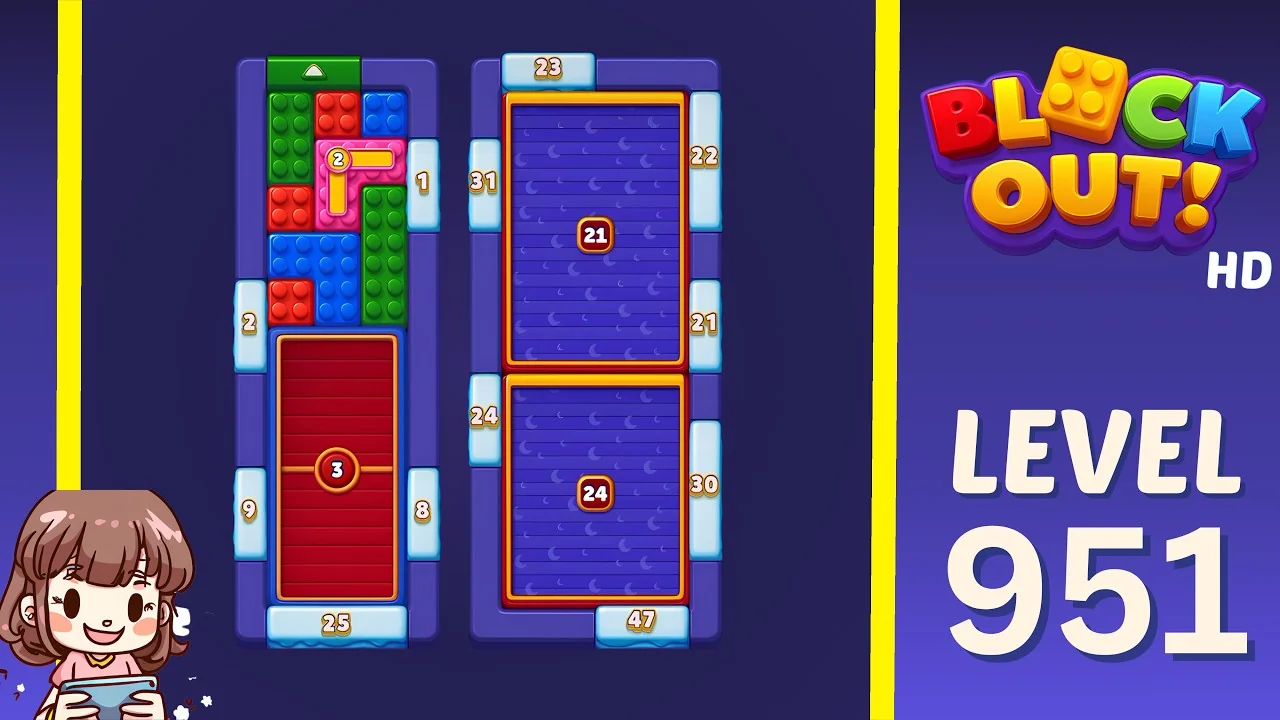
Open the Level 951 walkthrough or watch the video solution on YouTube.
The board splits into two tall columns. The left column carries the field on top, with a green up arrow gate at the very top, red, blue and green bricks, a pink horizontal slider marked 1, and a tall red tray marked 3 below it in an orange frame. The right column is nothing but trays: two large purple ones stacked, marked 21 and 24, each with an orange frame and a dividing bar. The counters read 2 and 9 on the left edge, 1 and 8 on its inner edge, 25 at the bottom of that column, and 23, 31, 22, 21, 24, 30 and 47 around the right column. The right column cannot be filled from the left, so every block that falls into the 21 and the 24 has to be produced by the field above them. That makes the left column a delivery chute: clear the 3 first so the field keeps moving, then let gravity feed the two big trays.
Level 952
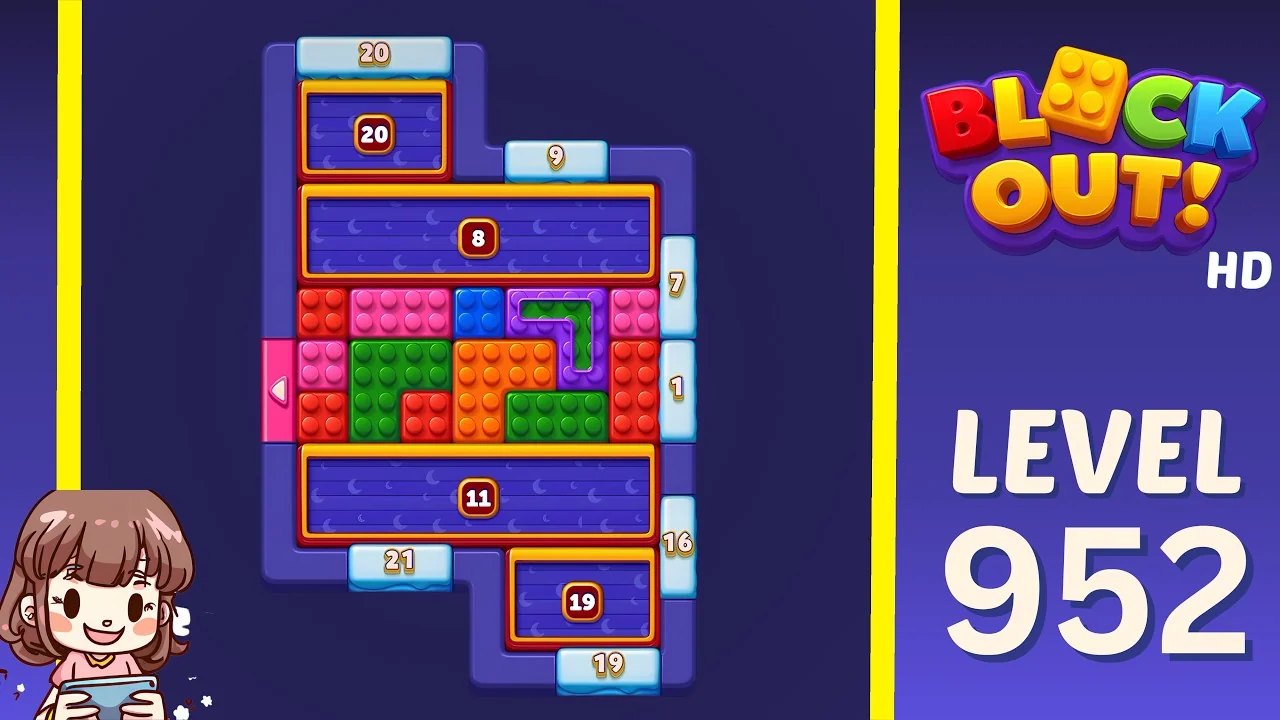
Open the Level 952 walkthrough or watch the video solution on YouTube.
A zigzag frame: a small blue tray marked 20 at the top inside an orange frame, then a wide purple tray marked 8, then the field in the middle, then a wide purple tray marked 11, then a small purple tray marked 19 tucked against the bottom right. The field is red, pink, green, orange and purple bricks with a pink left arrow slider on its left edge and a green L near its centre. The counters read 20 along the top, 9 above the right shoulder, 7 and 1 down the right, 16 beside the 11, 21 under the left side and 19 along the bottom. The frame steps sideways twice, so the board is not one column: the 20 and the 8 are fed from the upper field, the 11 and the 19 from the lower. Read the counters at the step you are working on, not the whole board, because the two halves never share a pool.
Level 953
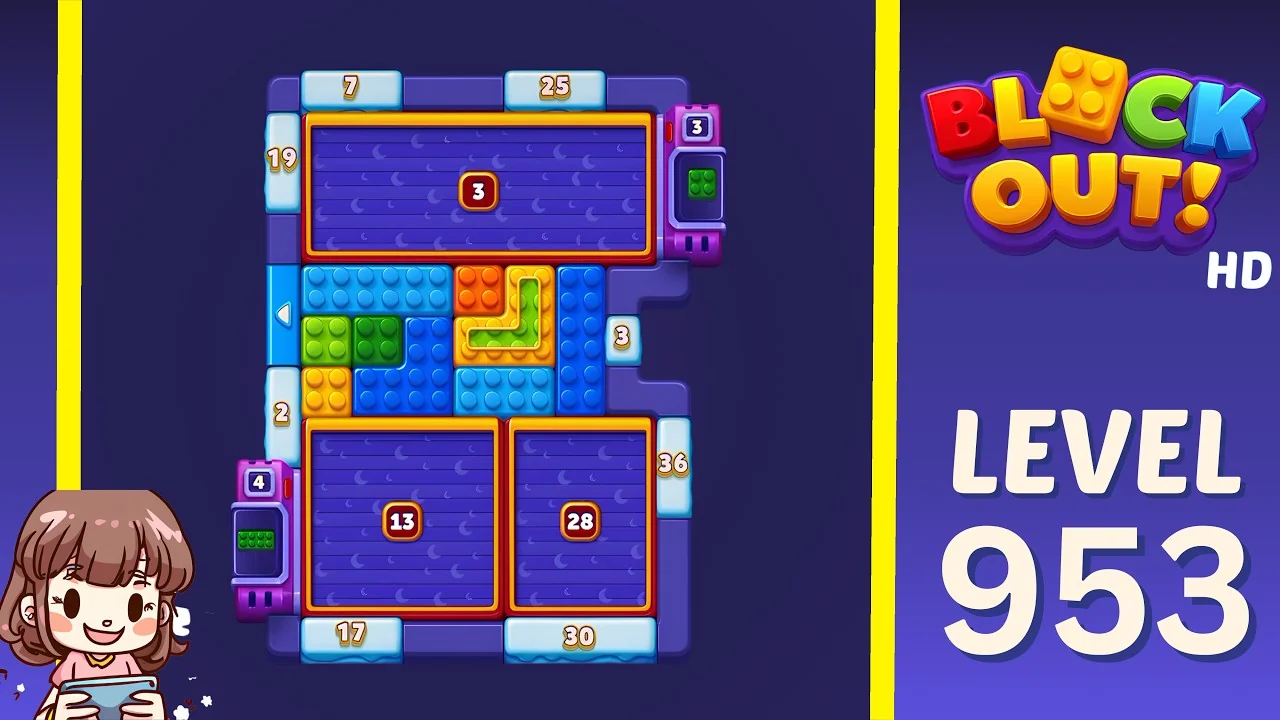
Open the Level 953 walkthrough or watch the video solution on YouTube.
A wide purple tray marked 3 across the top inside an orange frame, with a small purple dispenser clipped to the top right corner, marked 3 and showing a green block in its window. The field is below: blue, orange, green and yellow bricks, a cyan L on the left, an orange L in the middle, and purple sliders on both edges. A second small dispenser, marked 4, hangs off the bottom left corner. The main trays are the two purple ones at the bottom, marked 13 and 28, side by side in orange frames. The counters read 7 and 25 across the top, 19 and 2 down the left, 3 and 6 down the right, and 17 and 30 along the bottom. The two dispensers are the whole puzzle: 3 and 4 slots, each fed from a specific corner, and neither can be topped up once full. Fill them from the outermost blocks while the field is still wide, and leave the 13 and the 28 for the masses.
Level 954
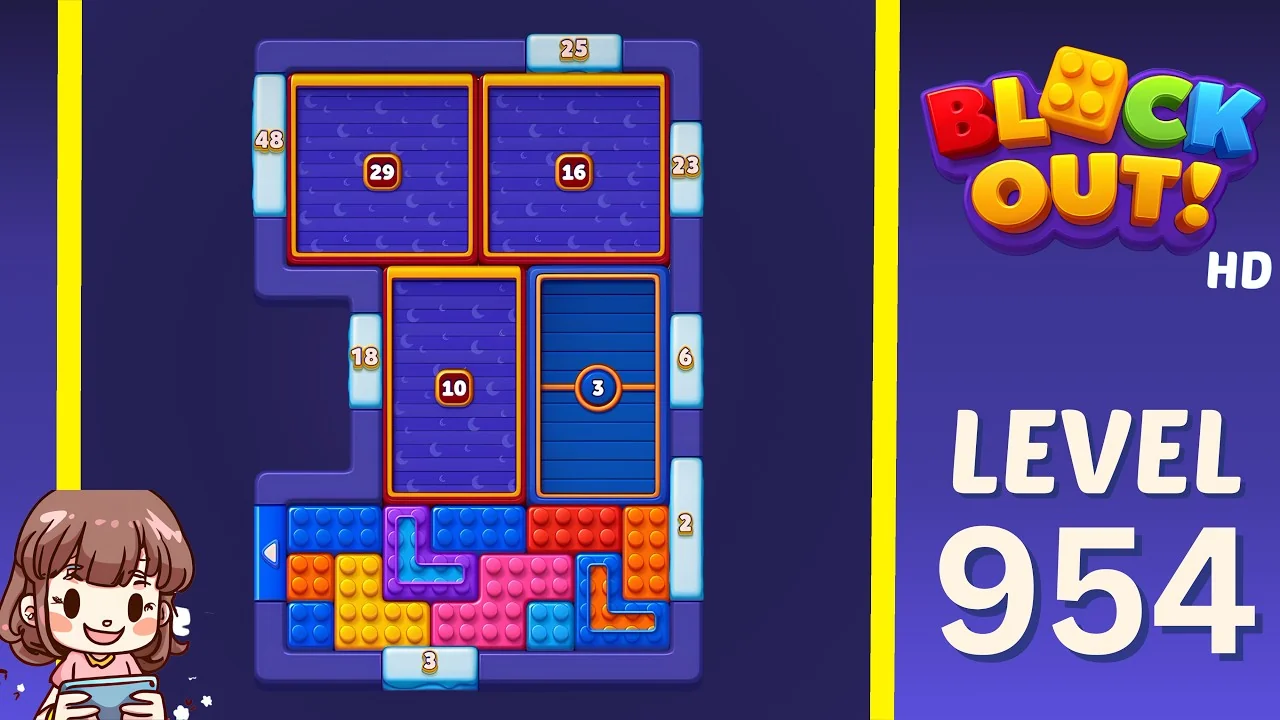
Open the Level 954 walkthrough or watch the video solution on YouTube.
Four trays wrap around a field at the bottom. The top pair are purple, marked 29 and 16, side by side in orange frames. The middle pair are a purple tray marked 10 and a blue tray marked 3. The field is the strip along the bottom, blue, orange, yellow, purple, pink and red bricks with a purple L and an orange L and a blue left arrow gate on the outer left edge. The counters read 48 down the left, 25 across the top, 23 and 6 and 2 down the right, and 3 along the bottom. This is the largest tray capacity in the batch by a wide margin, 29 and 16 up top against a field that is only a few rows deep. That margin is the solution: the bottom field is small enough to be cleared into the middle pair first, and the top pair then takes what falls, which is the reverse of how the batch started on 949.
What to watch for on these boards
The video is a verified solve, not a script. The useful part is the shape of the board:
- Count the trays before the counters. On 949, 950 and 954 there are four or five outlets under one field; the order they open decides the run, not the size of the biggest one.
- Small dispensers fill from one side only. The 6 on 950, the 3 and 4 on 953 and the 2 on 954 each take blocks from a single direction, so they have to be handled while that direction is still reachable.
- A split board never shares. The two columns on 951 and the two halves of 952 are separate puzzles joined by a frame, not by a route.
- Clear the small tray under the field first. On 949 and 951 the tray directly beneath the field is the chute; filling it early stalls everything above it.
- A wide top pair means the field can be spent downward. On 954 the 29 and 16 make the bottom strip the easy part, which is the opposite of the counting squeeze on 948.
How to use the walkthroughs
Every level from 949 to 954 has its own page with the board preview, difficulty rating and embedded video. A method that holds up on Expert boards:
- Watch only up to the first tray completing.
- Restart and replay that opening yourself.
- Keep going alone until you stall.
- Rewatch from the point your route went wrong, not from the start.
Browse all Block Out levels for the full library, or go back to the 944-948 log if you are still working through the previous batch.