Walkthrough editors
Block Out Levels 961-966: The Field Drops to the Bottom and Stays There
Block Out Levels 961-966: the field moves to the bottom on 961, 962, 965 and 966, 963 stacks two tall green columns under a top-field, and 964 hides a six-tray staircase below its board, with previews and video solutions for every level.
Related video walkthroughs
The library now runs to Level 966. 961 through 966 went up as one batch, all six rated Expert, and each one has a page on the site plus a video solution on YouTube. The previous batch was 955-960, so this picks up where that run ended.
Where the last batch kept moving the field between the top and the middle, this one settles it: on 961, 962, 965 and 966 the field is the floor of the board and every tray sits above it. That flips the reading of the board. A tray above the field is fed downward, and the only way out is the gate on the field's bottom edge, so the opening move is no longer "which tray is closest" but "which tray can still be reached once the field starts to empty." The two exceptions, 963 and 964, keep the field on top but put the weight of the puzzle in the wide trays below it.
The other thread is the return of two-cell and three-cell odd shapes. Level 962's field is built around an L-shaped green piece and an L-shaped red piece that interlock, and 964 has a staircase of trays down the frame instead of a flat row. On both, the odd piece is the constraint: it has to leave before the straight pieces around it can move, so the first tray you open decides whether the board stays open.
Levels 961-966 at a glance
| Level | Difficulty | Walkthrough | Video |
|---|---|---|---|
| Level 961 | Expert | Open the guide | Watch |
| Level 962 | Expert | Open the guide | Watch |
| Level 963 | Expert | Open the guide | Watch |
| Level 964 | Expert | Open the guide | Watch |
| Level 965 | Expert | Open the guide | Watch |
| Level 966 | Expert | Open the guide | Watch |
The six newest boards
Each entry below has the board preview, a link to its own page and the video solution. Watch only as far as the first tray completing, then restart and replay that part yourself before watching the rest.
Level 961
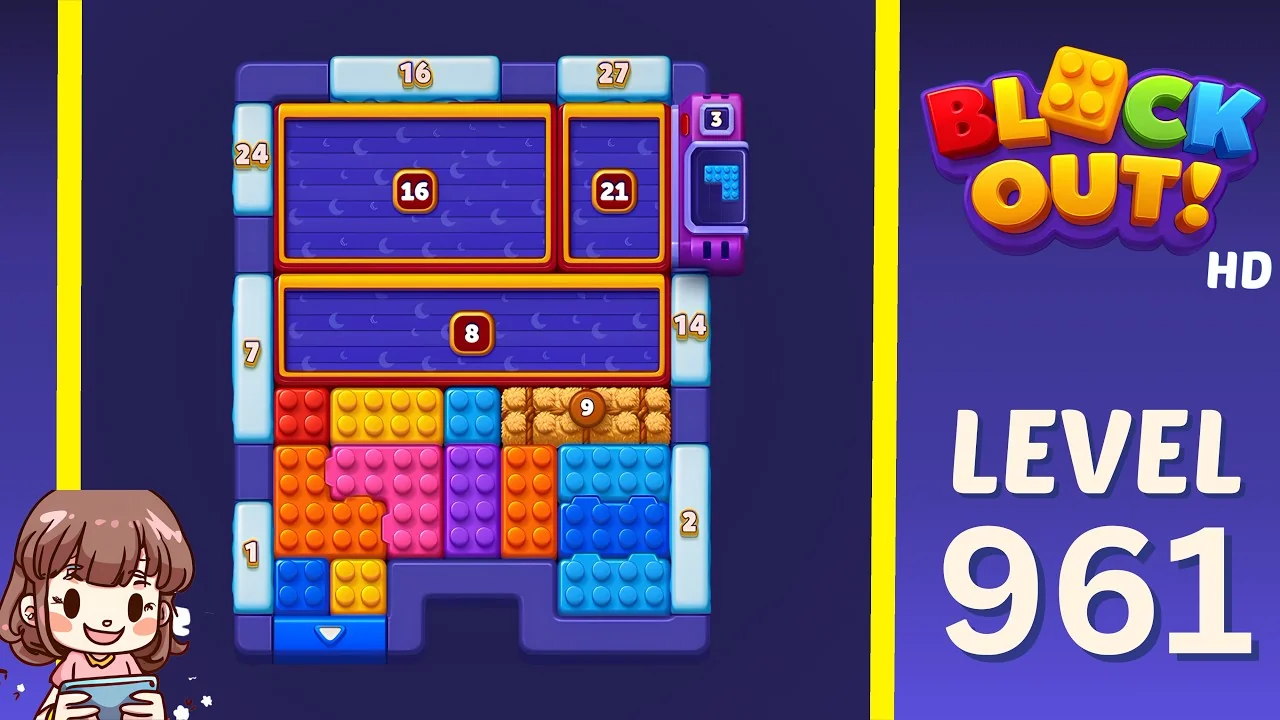
Open the Level 961 walkthrough or watch the video solution on YouTube.
The field is the bottom block: red, orange, yellow, pink, purple and blue bricks, a single wooden nine near its top edge, and a blue down arrow gate set into the bottom edge of the frame. Above it, three purple trays fill the top half: a wide one marked 16 on the left, a smaller one marked 21 beside it, and a purple dispenser marked 3 clipped to the right edge. Between the trays and the field sits a full-width purple tray marked 8 with a bar through the middle. The counters read 16 and 27 across the top, 24 on the left, 14 on the right, 7 and 1 down the left flank and 2 down the right. Because the field is underneath everything, the 8 is the only wide landing zone and the 16 and 21 are storage above it. Open the 8 late enough that it can take the first pass off the field, or the two top trays will fill with colours the field cannot reach.
Level 962
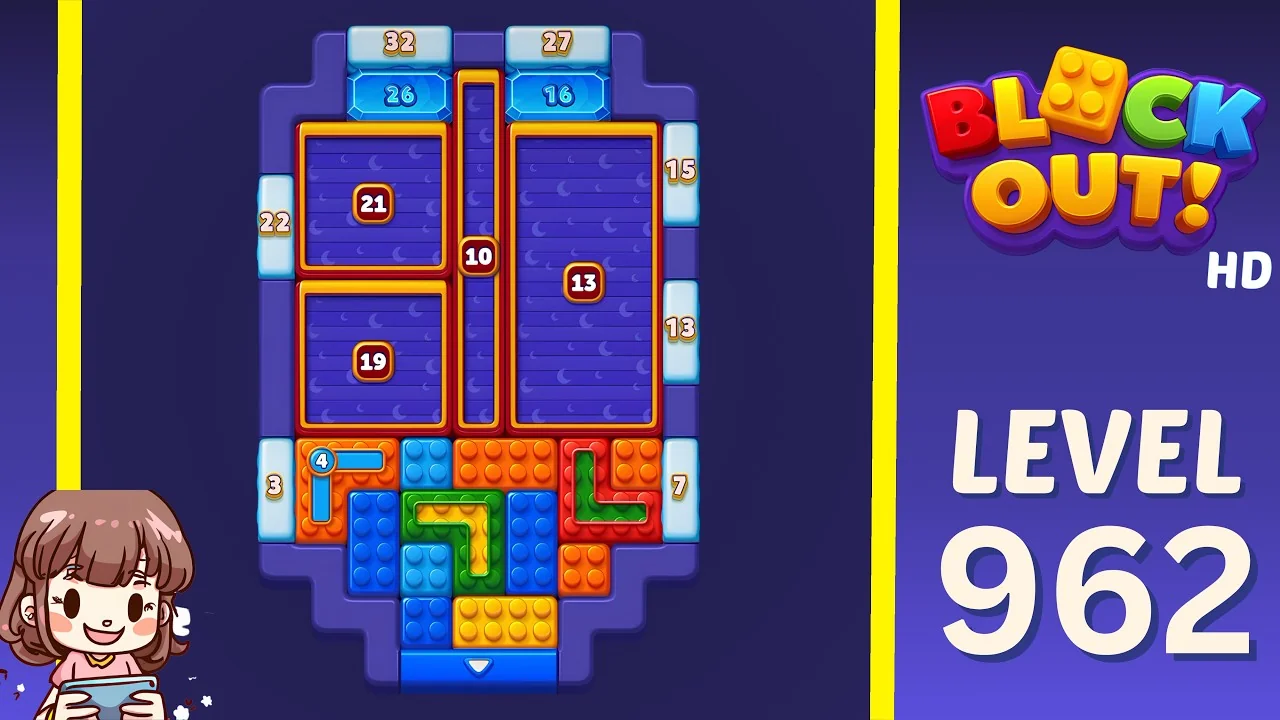
Open the Level 962 walkthrough or watch the video solution on YouTube.
A tall frame with the field at the bottom and a column of trays above it. The top row carries two blue trays marked 26 and 16 under counters 32 and 27, then a purple tray marked 21 on the left with a second purple tray marked 19 directly beneath it. A narrow vertical blue tray marked 10 runs between that left column and a large purple tray marked 13 that fills the right side. The side counters read 22 and 3 on the left and 15, 13 and 7 on the right. The field itself is blue, orange, green and red, with an L-shaped green piece and an L-shaped red piece interlocked in the middle and a blue L marked 4 in its upper-left corner. The blue down arrow is at the bottom centre. The two Ls are the whole board: neither can leave while the other is boxed in, so use the 10 as the narrow chute and keep the 13 for the second half.
Level 963
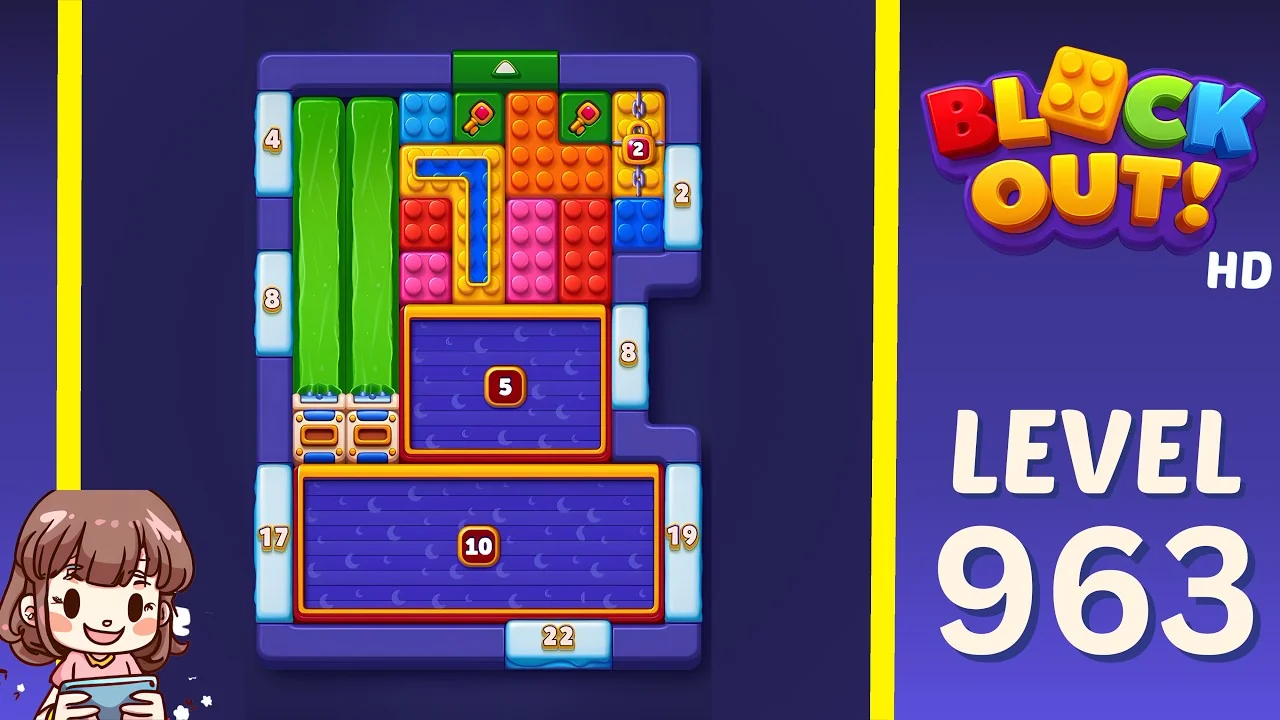
Open the Level 963 walkthrough or watch the video solution on YouTube.
The field is back on top, and it is mostly green. Two tall green columns stand side by side on its left edge, with blue, red, pink and orange bricks packed to their right, two red markers set into the upper bricks, a yellow up arrow gate on the top edge and a small yellow tray marked 2 on the right. The counters read 4 and 8 down the left and 2 and 8 down the right. Below the field, a small orange-framed tray marked 5 sits against a vertical wooden strip, and beneath that a wide purple tray marked 10 spans the bottom, with counters 17 and 19 on the flanks and 22 under it. The tall green columns are the reason this board is awkward: they are the tallest single pieces in the batch and they sit over the only narrow gap into the 5. Let them come out first, while the 10 is still empty.
Level 964
Open the Level 964 walkthrough or watch the video solution on YouTube.
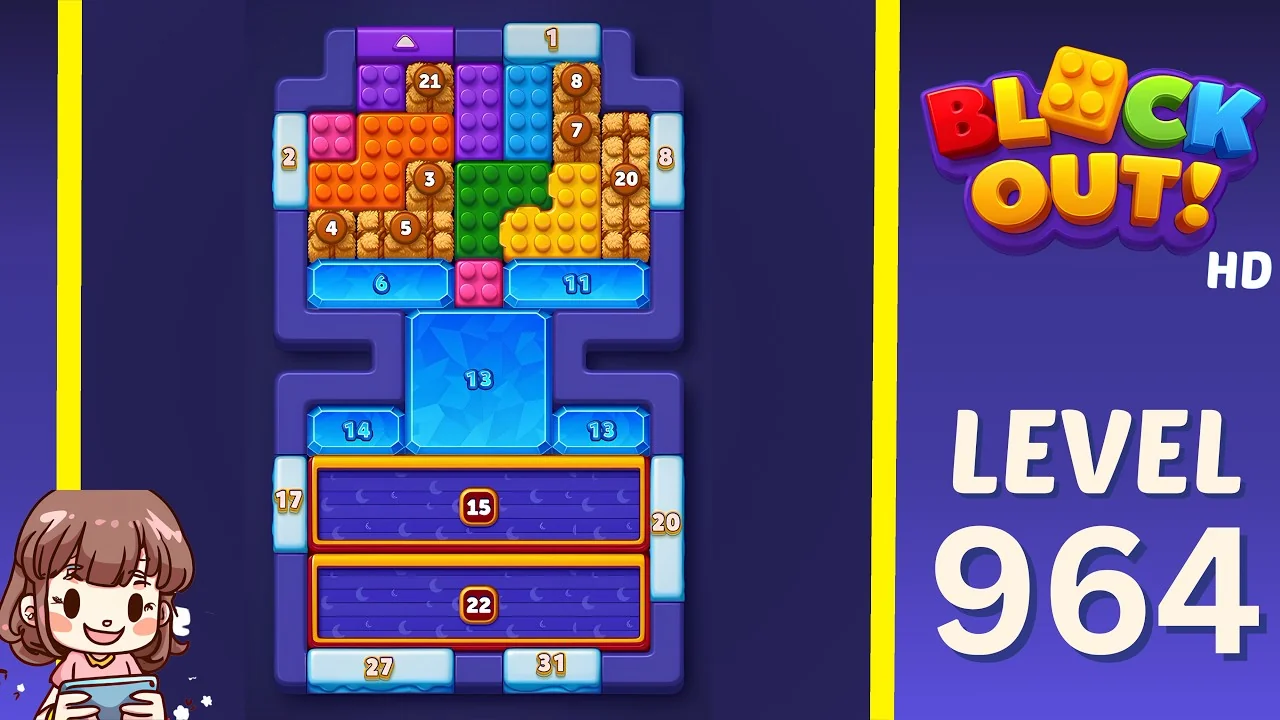
This is the biggest board in the batch and almost all of it is the field. Purple, orange, tan and yellow bricks fill the top, with counters 21, 8, 7, 20, 3, 4 and 5 set into the bricks themselves, a purple up arrow gate in the upper-left corner, a pink tray marked 1 above it and side counters 2 and 8. The field narrows to a waist, and below it the board becomes a staircase: two blue trays marked 6 and 11 with a small pink tray between them, then a wide light-blue tray marked 13, then blue trays marked 14 and 13, and finally two wide purple trays marked 15 and 22 stacked in orange frames. The bottom counters read 27 and 31, with 17 and 20 on the flanks. Six trays in a row look generous and are not: every one of them is below the field, so the order you fill them in is the order you will have to empty them. Start with the 6 and the 11, not the 15 and the 22.
Level 965
Open the Level 965 walkthrough or watch the video solution on YouTube.
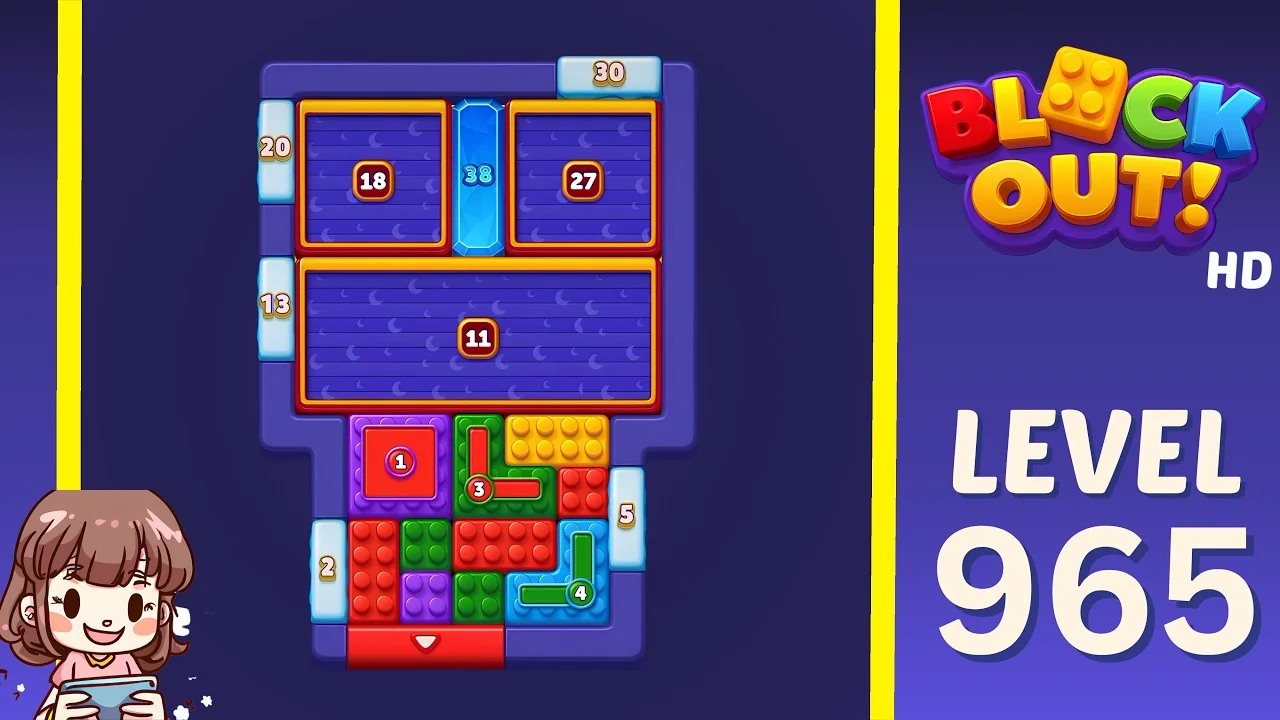
The field is on the floor again, but the top of the frame is unusually dense. A wide purple tray marked 18 sits on the left, a narrow vertical light-blue tray marked 38 stands between it and a purple tray marked 27 on the right, and a full-width purple tray marked 11 with a bar runs underneath all three. The counters read 30 above, 20 and 13 down the left. The field holds red, green, orange, blue and purple bricks, a framed red 1 at its left edge, a green piece marked 3 and a red piece marked 4 near the middle, a red down arrow on the bottom edge, 2 on the lower left and 5 on the right. The 38 is the odd tray: it is the tallest narrow tray on the board and it only sees blocks that pass the centre column. Treat it as a chute for one colour, not as general storage, and keep the 11 for the wide pass.
Level 966
Open the Level 966 walkthrough or watch the video solution on YouTube.
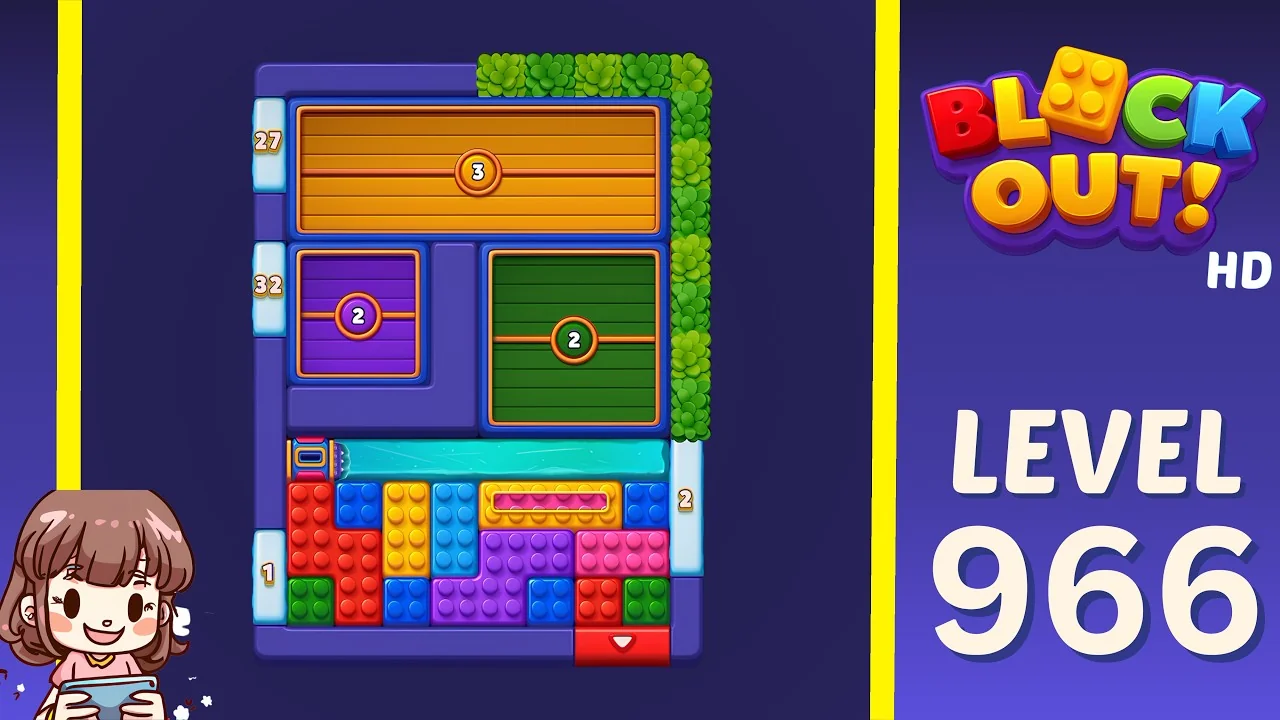
A narrow frame with ivy growing over its top right corner. The top half is three wide trays stacked like shelves: a wooden tray marked 3 with a bar across the full width, then a purple tray marked 2 on the left and a green tray marked 2 on the right, with counters 27, 32 and 1 down the left and 2 down the right. The field is at the bottom, a dense mix of red, blue, orange, green and purple bricks, with a light-blue strip laid across its top, a wooden gate with a purple slider on the left, a yellow tray holding a pink piece in the middle and a red down arrow in the bottom right corner. The three shelf trays all need the same low counts, which is the trap: the 3 will happily take the first three blocks of any colour and then sit there. Feed the two 2s first, keep the 3 for a colour you have already counted, and let the down arrow do the early work.
What to watch for on these boards
The video is a verified solve, not a script. The useful part is the shape of the board:
- A field on the floor empties downward. On 961, 962, 965 and 966 the gate is on the bottom edge, so the field can only shed blocks toward the trays above it after they have passed through the frame.
- Wide trays above a bottom field are storage, not exits. The 8 on 961, the 13 on 962, the 10 on 963 and the 11 on 965 all look like the main outlet and all of them should be opened late.
- Odd pieces set the order. The interlocked Ls on 962 and the six-tray staircase on 964 only move cleanly if the awkward shape leaves first.
- Tall narrow trays see one column. The 10 on 962 and the 38 on 965 sit in the centre waist, so they accept blocks from a single lane and should be used for a colour you are already clearing there.
- Low-count shelves fill fast. The three trays across the top of 966 need 3, 2 and 2; open them in the wrong order and they stop accepting blocks with the field still full.
How to use the walkthroughs
Every level from 961 to 966 has its own page with the board preview, difficulty rating and embedded video. A method that holds up on Expert boards:
- Watch only up to the first tray completing.
- Restart and replay that opening yourself.
- Keep going alone until you stall.
- Rewatch from the point your route went wrong, not from the start.
Browse all Block Out levels for the full library, or go back to the 955-960 log if you are still working through the previous batch.